
Quick take: Newborn photography at home is a beautiful, budget-friendly way to capture those tiny early moments—but safety and timing are everything. With the right props, lighting, and patience, you can create stunning, natural photos without a pro. Just remember: always prioritize your baby’s comfort and follow strict safety rules.Newborn Photography at Home DIY: A Modern Mom’s Honest Guide
You’re holding your newborn for the first time, their tiny fingers curled around yours, and you feel that overwhelming urge to freeze this moment forever. The internet has flooded your feed with those dreamy, ethereal newborn photos—soft skin, dreamy expressions, and a backdrop that looks like it’s straight out of a nursery catalog. But hiring a professional photographer? That’s a $500+ bill you might not be ready for. So what do you do?
You could try DIY newborn photography at home. But here’s the thing: it’s not as simple as snapping a few shots with your phone. There’s a delicate balance between capturing those precious moments and ensuring your baby’s safety, comfort, and well-being. And let’s be real—you’ve got enough on your plate as a new mom. Between those first sleepless nights, adjusting to working from home, and figuring out how to keep everything sanitary (hello, clutter-free home swaps), the last thing you need is another stressor.
But what if I told you that with the right prep, patience, and a few smart tricks, you could take gorgeous, professional-quality photos of your newborn at home—without breaking the bank or sacrificing safety? That’s what this guide is all about. We’ll walk you through everything from the essential props to the best lighting techniques, how to keep your baby calm, and even how to edit your photos like a pro. And yes, we’ll talk about the safety checklist—because nothing is more important than keeping your little one happy, healthy, and safe.
So grab your camera (or your phone—we won’t judge), and let’s dive in. This is your honest, no-BS guide to DIY newborn photography at home.
--- ## **The Honest Truth About DIY Newborn Photography: Is It Worth It?**Let’s start with the elephant in the room: is DIY newborn photography really worth the effort? The answer depends on what you’re hoping to achieve. If you’re looking for a few keepsake shots to remember those first weeks, then yes—it’s absolutely doable. If you’re dreaming of a full photo shoot that looks like it belongs in a magazine, you might want to temper those expectations a bit.
Here’s the reality: newborns are unpredictable. They’re tiny, fragile, and have zero interest in posing for the camera. Their sleep cycles are erratic, their tiny bodies are constantly changing shape, and they’re more likely to wake up from a yawn than a smile. That’s why professional photographers spend hours (and sometimes days) with newborns to capture those perfect moments. They know how to read baby cues, how to keep them calm, and how to work with the lighting and props to create that dreamy aesthetic.
But that doesn’t mean you can’t do it yourself. Many new moms (and dads!) have successfully captured stunning photos of their newborns at home with minimal equipment and a lot of patience. The key is to manage expectations, focus on safety, and embrace the imperfections. After all, those little wrinkles and sleepy expressions are part of what makes newborn photos so special.
If you’re wondering whether it’s safe to photograph your newborn at home without a professional, the answer is yes, as long as you follow safety guidelines. But we’ll dive deeper into that in the next section. For now, let’s talk about what you’ll need to get started.
--- ## **How to Safely Pose a Newborn for DIY Home Photography Without Professional Help**Posing a newborn can feel like trying to teach a cat to sit still—it’s not impossible, but it does require a bit of finesse. The good news is that newborns are naturally flexible and adaptable, which means they can be posed in some pretty cute ways. The bad news? They don’t understand the concept of “hold still for the camera.” So how do you get those dreamy poses without stressing your baby (or yourself)?
First, remember that safety is always the top priority. Newborns are incredibly fragile, and their tiny bodies need to be supported properly. Never leave your baby unattended, even for a second. Always keep one hand on them at all times, and never use props that could pose a choking hazard or cause them to slip. If you’re unsure about a pose, skip it. There’s no such thing as a “perfect” pose—just a safe one.
Here are some of the most popular and safest poses for DIY newborn photography:
- Sleeping Pose: The easiest and safest pose is simply capturing your baby while they’re sleeping. Place them on their back in a bassinet, on a soft blanket, or even in your arms. Use a soft, neutral backdrop to keep the focus on your little one.
- Tummy Time: If your baby is awake and alert, you can gently place them on their tummy for a few minutes. Support their head and chest with a rolled-up towel or a small pillow. This pose can help with muscle development and also looks adorable in photos.
- Cradle Hold: Hold your baby close to your chest, supporting their head and neck. You can also gently tuck their arms or legs in a way that feels natural for them. This pose is great for capturing those intimate, loving moments.
- Seated Pose: If your baby is old enough to sit up with support (usually around 4–6 weeks), you can gently prop them up on a soft pillow or against a cushion. Make sure they’re always supported and never left alone.
- Foot Pose: This is a classic newborn pose where you gently place your baby’s feet in their mouth to create a loop. It looks sweet and is easy to do, but be gentle—your baby’s tiny bones are still developing.
Pro tip: If your baby is fussy or resistant to posing, try swaddling them. A snug swaddle can help them feel secure and calm, making it easier to capture those dreamy shots. Just make sure they’re not too tight—you want them to be comfortable, not restricted.
And remember, if your baby is crying or seems uncomfortable, it’s okay to take a break. There’s no rush to get every pose perfect. The goal is to capture the moments that feel right for you and your baby.
--- ## **Essential Newborn Photography Props Every First-Time Mom Should Invest In (Budget-Friendly Options)**You don’t need a fancy studio setup to take beautiful newborn photos at home. In fact, many of the best props are things you already have lying around the house. But if you’re looking to invest in a few key items to elevate your photos, here’s what we recommend:
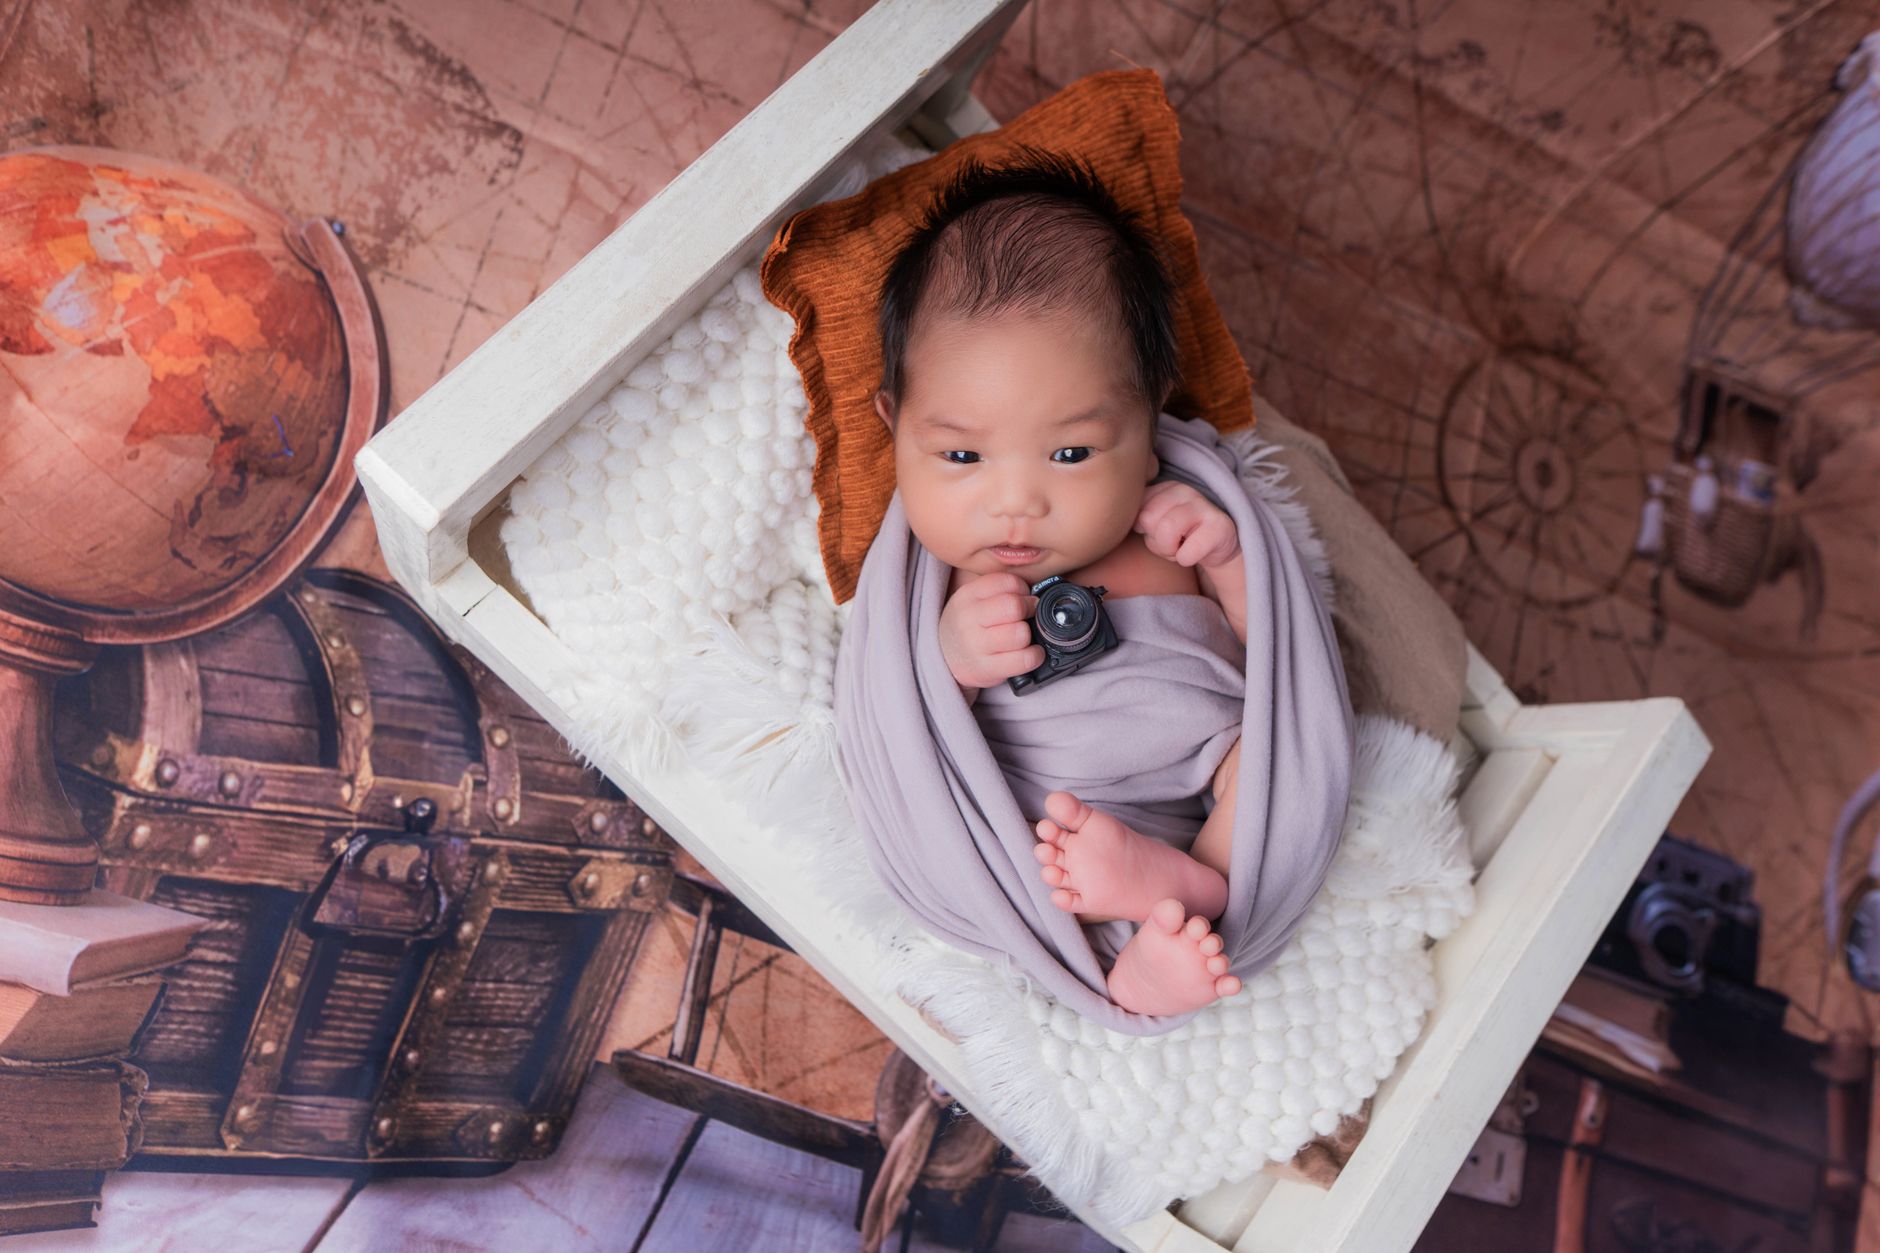
Pro tip: Keep your props simple. The goal is to highlight your baby, not distract from them. Too many props can make the photo feel cluttered and less focused.
--- ## **Step-by-Step Guide to Lighting for Newborn Photography at Home**Lighting is one of the most important elements in newborn photography. Good lighting can make your photos look soft, dreamy, and professional—even if you’re using just your smartphone. Bad lighting can make your baby look washed out, harsh, or even unflattering. So how do you get it right?
The good news is that natural light is often the best option for newborn photography. It’s soft, flattering, and easy to work with. But artificial light can also work well if you know how to use it. Here’s how to master both:
### **Natural Lighting:** 1. **Best Time of Day:** The softest natural light is usually during the “golden hours”—shortly after sunrise or just before sunset. But if you’re shooting during the day, aim for a time when the sun isn’t directly overhead. Early morning or late afternoon light is ideal. 2. **Positioning:** Place your baby near a large window, but avoid direct sunlight, which can create harsh shadows. Instead, use a sheer curtain or a white sheet to diffuse the light slightly. 3. **Backdrop:** If you’re shooting against a wall or a backdrop, make sure it’s evenly lit. You can use a lamp or a reflector to bounce light onto the background if needed. 4. **Avoid Overhead Lights:** Fluorescent or overhead lights can create unflattering shadows. If you must use them, diffuse the light with a white sheet or a softbox. ### **Artificial Lighting:** 1. **Ring Light or Softbox:** If you’re shooting in low light, a small ring light or a softbox can help brighten the scene. Place it at a 45-degree angle to your baby to avoid harsh shadows. 2. **Reflectors:** A white reflector (or even a piece of foam board) can help bounce light onto your baby’s face, reducing shadows. 3. **Balance Light Sources:** If you’re using both natural and artificial light, make sure they’re balanced. Too much artificial light can wash out your baby’s skin tone.Pro tip: Shoot in RAW format if your camera allows it. RAW files give you more flexibility when editing, so you can adjust the lighting and colors without losing quality.
--- ## **How to Capture Newborn Sleepy Moments Naturally Without Waking Them Up**One of the hardest (and most rewarding) parts of newborn photography is capturing those precious sleepy moments. Newborns sleep 14–17 hours a day, but their sleep cycles are short and unpredictable. So how do you get those dreamy, undisturbed shots without waking your baby?
First, timing is everything. Newborns tend to be sleepiest during the early morning hours (around 4–6 AM) and in the late afternoon (around 6–8 PM). This is when their natural sleep cycles align with the world’s sleep cycles, making it easier to capture them in a deep, restful state.
Here are some tips to help you capture those sleepy moments:
- Wake Them Up (Gently): If your baby is fussy or resistant to sleeping, try gently waking them up first. A soft touch, a quiet lullaby, or even a warm bath can help them relax and drift off again. This is called the “wake-and-sleep” technique, and it’s a favorite among photographers.
- Use a Pacifier: If your baby uses a pacifier, it can help soothe them and keep them asleep longer. Just make sure it’s clean and safe for use.
- Keep the Room Dark and Quiet: Newborns are sensitive to light and sound. Keep the room dimly lit and avoid loud noises to help them stay asleep.
- Use a Soft, Neutral Backdrop: A plain, light-colored backdrop can help keep the focus on your baby and reduce distractions.
- Be Patient and Flexible: Newborns don’t stay asleep for long. Be ready to capture the moment as soon as they drift off, and don’t be discouraged if they wake up quickly. Sometimes the best shots come from those brief, fleeting moments.
Pro tip: If your baby is fussy or seems uncomfortable, it’s okay to take a break. There’s no rush to get every shot perfect. The goal is to capture the moments that feel right for you and your baby.
--- ## **Common Newborn Photography Mistakes DIY Moms Make (And How to Avoid Them)**Even the most experienced photographers make mistakes when it comes to newborn photography. But as a DIY mom, it’s especially important to be aware of common pitfalls so you can avoid them and capture the best possible shots. Here are some of the most common mistakes—and how to fix them:
### **1. Ignoring Safety First**Always prioritize your baby’s safety. Never leave them unattended, even for a second. Avoid poses that could restrict their breathing or cause them to slip. If you’re unsure about a pose, skip it. Safety should always come first.
### **2. Overdoing the Props**Too many props can make your photo feel cluttered and less focused. Stick to a few simple, neutral items to keep the focus on your baby.
### **3. Poor Lighting**Harsh or uneven lighting can make your photos look flat or unflattering. Use soft, diffused light—either natural or artificial—and avoid overhead lights.
### **4. Not Capturing the Imperfections**Newborns aren’t always perfect—wrinkles, sleepy expressions, and tiny hands and feet are all part of what makes them so special. Don’t try to force a “perfect” pose. Instead, embrace the imperfections and capture the real moments.
### **5. Shooting in Burst Mode Too Much**If you’re using a camera, shooting in burst mode can help you capture those fleeting moments. But if you’re using a smartphone, try to take a few individual shots instead of a long burst. This can help you avoid blurry or out-of-focus photos.
### **6. Not Editing for Natural Tones**Newborn photos look best with a soft, natural edit. Avoid heavy filters or unnatural colors. Instead, focus on enhancing the natural tones and keeping the skin soft and flattering.
### **7. Trying to Shoot When Baby Is Fussy**If your baby is crying or seems uncomfortable, it’s okay to take a break. There’s no rush to get every shot perfect. The goal is to capture the moments that feel right for you and your baby.
Pro tip: If you’re struggling to capture the perfect shot, try stepping back and observing your baby. Sometimes the best photos come from those spontaneous, unposed moments.
--- ## **How to Edit Newborn Photos at Home Using Free or Affordable Software for Beginners**Editing is where you can take your newborn photos from “good” to “gorgeous.” The key is to enhance the natural tones and colors without overdoing it. Here’s how to edit your photos like a pro, even if you’re a beginner:
### **Step 1: Choose Your Software**You don’t need expensive software to edit your newborn photos. Here are some great free or affordable options:
- Lightroom Mobile (Free with Subscription): A user-friendly app that’s perfect for beginners. It offers easy-to-use sliders for adjusting exposure, contrast, and color.
- Snapseed (Free): A powerful editing app with a simple interface. It’s great for adjusting lighting, removing red-eye, and adding subtle filters.
- Canva (Free with Premium Options): If you’re looking for a more creative approach, Canva offers templates and tools for editing photos with a fun, artistic touch.
- GIMP (Free): A more advanced (but free) alternative to Photoshop. It’s a bit more complex, but it offers a lot of control over your edits.
Start by adjusting the basic settings to enhance your photo:
- Exposure: Brighten or darken the photo as needed. Aim for a balanced exposure where your baby’s skin tone looks natural.
- Contrast: Increase contrast slightly to make your baby’s features stand out. But don’t overdo it—you want a soft, natural look.
- White Balance: Adjust the white balance to ensure your baby’s skin tone looks warm and natural. Aim for a slightly warmer tone (around 5500–6000K).
- Sharpening: Add a subtle sharpening effect to enhance your baby’s features without making the photo look unnatural.
Newborn skin can be a bit on the red or uneven side. Here’s how to smooth it out:
- Dodge and Burn: Gently lighten the high points of your baby’s face (like the cheekbones and forehead) and darken the shadows slightly to create a more defined look.
- Skin Smoothing: Use a soft brush tool to gently smooth out any imperfections. But don’t overdo it—you want your baby’s skin to look natural, not plastic.
- Color Correction: If your baby has a warm or cool skin tone, adjust the color balance to enhance it. For example, if your baby has a cool undertone, you might add a slight warm tone to make their skin look more natural.
Newborn photos look best with a soft, dreamy filter. Avoid heavy or unnatural effects. Instead, try adding a subtle vignette or a slight desaturation to enhance the natural tones.
### **Step 5: Crop and Straighten**Finally, crop your photo to remove any distractions and straighten the horizon if needed. A well-cropped photo can make a big difference in the final look.
Pro tip: Always save your original photo before editing. This way, you can go back and adjust your edits if needed.
--- ## **Newborn Photography Safety Checklist: What to Avoid When Photographing Your Baby at Home**Safety is the most important part of DIY newborn photography. Your baby’s well-being should always come first. Here’s a comprehensive safety checklist to help you avoid common risks:
### **Before the Photoshoot:** - [ ] **Check your baby’s health:** If your baby has any medical conditions or is recovering from illness, consult your pediatrician before the photoshoot. - [ ] **Avoid overfeeding:** Newborns can get fussy or sleepy after eating. Try to schedule the photoshoot for a time when your baby is well-fed and content. - [ ] **Keep the room warm:** Newborns are sensitive to temperature changes. Keep the room at a comfortable temperature (around 70–75°F or 21–24°C). - [ ] **Clear the space:** Remove any tripping hazards or sharp objects from the area where you’ll be shooting. - [ ] **Have a first aid kit handy:** Just in case, keep a basic first aid kit nearby in case of any minor injuries. ### **During the Photoshoot:** - [ ] **Never leave your baby unattended:** Even for a second. Always keep one hand on them at all times. - [ ] **Avoid poses that restrict breathing:** Never place your baby on their stomach for an extended period, and avoid poses that could restrict their airway. - [ ] **Use soft, breathable fabrics:** Avoid anything that could irritate your baby’s skin or cause them to overheat. - [ ] **Keep props safe:** Avoid small objects that could pose a choking hazard. Always supervise your baby around props. - [ ] **Monitor your baby’s vitals:** If your baby seems fussy, lethargic, or has trouble breathing, stop the photoshoot and check with your pediatrician. - [ ] **Follow the AAP safe sleep guidelines:** Always place your baby on their back for sleep, and avoid using loose blankets or pillows. ### **After the Photoshoot:** - [ ] **Wash your hands:** After handling your baby, wash your hands thoroughly to avoid spreading germs. - [ ] **Check for any skin irritation:** If your baby’s skin looks red or irritated, consult your pediatrician. - [ ] **Store props safely:** Keep any props used during the photoshoot clean and stored safely for future use.Pro tip: If you’re ever unsure about a pose or prop, skip it. There’s no rush to get every shot perfect. Your baby’s safety is always the top priority.
--- ## **How to Photograph Newborns with Multiple Babies or Siblings in the Same Shot**If you have more than one baby—or if your little one has an older sibling who wants to join in the fun—you can still capture beautiful photos together. The key is to keep everyone safe, comfortable, and happy. Here’s how:
### **Safety First:** - Always supervise all children during the photoshoot. - Avoid poses that could cause any of the babies to slip or fall. - Keep older siblings from pulling on or disturbing the newborn. ### **Posing Tips:** - **Side-by-Side:** Place the newborn in a bassinet or on a soft blanket, and have the older sibling sit or kneel beside them. Use a neutral backdrop to keep the focus on the babies. - **Holding Pose:** Have the older sibling gently hold the newborn (with your supervision) for a sweet, intimate shot. Make sure the older sibling is supporting the baby’s head and neck properly. - **Background Shot:** If the older sibling is standing behind the newborn, use a soft, diffused light to avoid harsh shadows. You can also have the sibling gently place their hand on the newborn’s back or shoulder for a cute touch. ### **Keeping Everyone Calm:** - Keep the photoshoot short and sweet. Newborns and toddlers have short attention spans, so don’t overdo it. - Use toys or distractions to keep the older sibling engaged while you capture the shots. - Take breaks often to feed, change, or comfort the babies.Pro tip: If the older sibling is fussy or resistant, try involving them in the photoshoot. Let them help with props or even take a turn holding the camera (with your guidance). This can make them feel more included and less likely to cause trouble.
--- ## **Best Time of Day for Newborn Photography at Home to Get the Softest Natural Light**As we mentioned earlier, natural light is often the best option for newborn photography. But timing is everything. The softest, most flattering light is usually found during the “golden hours”—shortly after sunrise or just before sunset. But if you’re shooting during the day, here’s how to make the most of natural light:
### **Morning Light (6–9 AM):** - **Pros:** Soft, diffused light with a warm tone. Great for capturing those early morning sleepy moments. - **Cons:** Can be cooler in temperature, so you might need to add a slight warm filter to enhance the skin tone. - **Tip:** Shoot near a large window with a sheer curtain to diffuse the light slightly. ### **Late Afternoon Light (4–7 PM):** - **Pros:** Warm, golden light with long shadows. Perfect for creating a dreamy, ethereal look. - **Cons:** Can be harsher as the sun gets lower in the sky, so you might need to adjust your positioning. - **Tip:** Face your baby toward the window to avoid harsh shadows on their face. ### **Midday Light (10 AM–3 PM):** - **Pros:** Bright and even, which can be great for filling in shadows. - **Cons:** Harsh and unflattering, with strong shadows and a cooler tone. - **Tip:** If you must shoot in midday light, use a white sheet or a softbox to diffuse the light and reduce shadows.Pro tip: If you’re shooting in a room with limited natural light, try opening all the curtains and windows to let in as much light as possible. You can also use a reflector to bounce light onto your baby’s face.
--- ## **How to Keep a Newborn Calm and Cooperative During a DIY Home Photoshoot**Newborns are not known for their patience—or their love of posing. In fact, they’re more likely to wake up from a yawn than a smile. So how do you keep your baby calm and cooperative during a photoshoot? Here are some tips:
### **1. Feed Them First**Newborns are often fussy when they’re hungry or overtired. Try feeding them right before the photoshoot to keep them content and sleepy. A well-fed baby is a happy baby.
### **1. Swaddle Them**Swaddling can help your baby feel secure and calm. Use a soft, breathable swaddle to keep them snug and comfortable. Just make sure they’re not too tight—you want them to be able to move their hips and legs freely.
### **2. Use a Pacifier**If your baby uses a pacifier, it can help soothe them and keep them asleep longer. Just make sure it’s clean and safe for use.
### **3. Keep the Room Dark and Quiet**Newborns are sensitive to light and sound. Keep the room dimly lit and avoid loud noises to help them stay calm and relaxed.
### **4. Move Slowly and Gently**Newborns are easily startled by sudden movements. Move slowly and gently when positioning your baby, and avoid any sudden loud noises.
### **5. Take Breaks Often**Newborns have short attention spans. If your baby seems fussy or uncomfortable, take a break. There’s no rush to get every shot perfect. The goal is to capture the moments that feel right for you and your baby.
### **6. Involve Dad or a Helper**If you’re the one holding the camera, it can be hard to keep your baby calm at the same time. Ask your partner or a trusted friend to help hold and soothe your baby while you take the shots.
Pro tip: If your baby is crying or seems uncomfortable, it’s okay to take a break. There’s no rush to get every shot perfect. Your baby’s comfort and well-being should always come first.
--- ## **What to Wear for Newborn Photography at Home That Looks Good in Photos**You’re not just photographing your baby—you’re also documenting your own journey as a mom. So what you wear can make a big difference in the final photos. Here’s how to choose outfits that look great in pictures:
### **For Moms:** - **Neutral Tones:** Soft, neutral colors like cream, beige, pastels, or muted tones work best. They keep the focus on your baby and create a cohesive, dreamy look. - **Flowing Fabrics:** Think silk, chiffon, or soft cotton. These fabrics move gracefully and look stunning in photos. - **Simple Silhouettes:** Avoid tight or overly detailed outfits. A simple, elegant dress or a soft blouse with a skirt or pants is perfect. - **Accessories:** Keep accessories minimal. A delicate necklace, a soft headband, or a simple scarf can add a touch of elegance without distracting from your baby. - **Comfort First:** You’ll be moving around a lot, so make sure your outfit is comfortable and easy to wear. ### **For Baby:** - **Soft, Breathable Fabrics:** Newborns have sensitive skin, so opt for organic cotton, bamboo, or other soft, breathable materials. - **Neutral Colors:** Stick to soft neutrals like cream, white, beige, or pastels. These colors look timeless and keep the focus on your baby’s features. - **Simple Outfits:** Avoid busy patterns or bright colors that can be distracting. A simple onesie, a soft hat, or a delicate blanket can look stunning in photos. - **Avoid Fasteners:** Skip buttons, zippers, or other fasteners that could irritate your baby’s skin or get caught on props. ### **For Siblings:** - **Coordinate (But Don’t Match):** If you have older siblings joining in, coordinate their outfits with yours or your baby’s. But don’t worry about matching—just keep the colors and fabrics cohesive. - **Comfortable and Fun:** Let your older kids wear something they love. The key is to keep them comfortable and happy so they don’t cause trouble during the photoshoot.Pro tip: If you’re unsure about an outfit, try it on and take a few test shots. This can help you see how it looks in photos before you commit to the full photoshoot.
--- ## **How to Photograph Newborns with Different Skin Tones Naturally Without Filters**Newborns come in all shapes, sizes, and skin tones—and every one of them is beautiful. The key to capturing their natural beauty is to avoid heavy filters or unnatural edits that can wash out their skin tone. Here’s how to photograph newborns with different skin tones naturally:
### **1. Use Natural Light**Natural light is the best way to capture the natural tones of your baby’s skin. Avoid harsh artificial light, which can create unflattering shadows or wash out their complexion.
### **2. Adjust White Balance**Most cameras have a white balance setting that allows you to adjust the color temperature. For newborns with cooler skin tones, aim for a slightly warmer white balance (around 5500–6000K). For warmer skin tones, you might need to adjust slightly cooler.
### **3. Edit for Natural Tones**When editing, avoid heavy filters or unnatural color corrections. Instead, focus on enhancing the natural tones:
- Cooler Skin Tones: Add a subtle warm filter to enhance the natural undertones. Avoid over-saturating the colors.
- Warmer Skin Tones: Keep the colors natural and avoid adding too much warmth. A slight cool filter can help balance the tones.
- Mixed Skin Tones: If your baby has mixed skin tones, focus on enhancing the natural contrast between the tones. Avoid heavy editing that could make the differences look unnatural.
When editing, aim for a soft, natural look. Dodge and burn gently to enhance your baby’s features without creating harsh contrasts. Keep the skin tone even and avoid any unnatural highlights or shadows.
### **5. Capture the Real Moments**Sometimes the best photos are the ones that capture your baby’s natural expressions and imperfections. Don’t try to force a “perfect” look—embrace the real moments and let them shine.
Pro tip: If you’re unsure about editing, try using a preset that’s designed for natural skin tones. Many editing apps offer presets that can help you achieve a soft, natural look with minimal effort.
--- ## **Newborn Photography at Home: How to Create a Cozy and Safe Backdrop for Baby Photos**A great backdrop can make or break your newborn photos. It should be soft, safe, and visually appealing—without stealing the spotlight from your baby. Here’s how to create the perfect backdrop:
### **1. Choose a Neutral Color**Neutral colors like cream, beige, white, or soft pastels work best. They keep the focus on your baby and create a timeless, elegant look. Avoid bright or busy patterns that can be distracting.
### **2. Use Soft, Breathable Fabrics**Newborns have sensitive skin, so avoid anything that could irritate them. Opt for organic cotton, bamboo, or other soft, breathable materials. You can also use a plain, unbleached sheet or a soft blanket.
### **3. Keep It Simple**A simple, uncluttered backdrop is best. Avoid too many props or decorations, which can make the photo feel busy and less focused. A plain wall, a soft fabric draped over a chair, or a large piece of neutral-colored fabric works perfectly.
### **4. Ensure It’s Safe**Make sure your backdrop is safe for your baby. Avoid anything that could pose a choking hazard or cause them to overheat. Keep it flat and stable, and always supervise your baby while they’re on it.
### **5. Add Texture for Depth**If you want to add a bit of texture to your backdrop, consider using a soft, textured fabric like velvet, linen, or a knit blanket. Just make sure it’s safe and comfortable for your baby.
### **6. Use a DIY Backdrop Hack**If you don’t have a neutral-colored fabric, you can create your own backdrop using a large piece of white or cream-colored paper, a sheet, or even a piece of cardboard covered in fabric. Just make sure it’s large enough to fill the background without leaving gaps.
Pro tip: If you’re shooting in a room with hard surfaces like walls or floors, use a soft, diffused light to avoid harsh shadows. This can help create a more natural, dreamy look.
--- ## **How to Take Newborn Photos Without a Professional Camera Using Just a Smartphone**You don’t need a fancy DSLR or mirrorless camera to take beautiful newborn photos. Many moms have successfully captured stunning shots using just their smartphones. Here’s how:
### **1. Use the Right Camera Settings**Most modern smartphones have excellent cameras, but you can still optimize your settings for the best results:
- Use the High-Quality Mode: Most smartphones have a high-quality or “Pro” mode that allows you to adjust settings like ISO, shutter speed, and white balance. Use this mode for the best results.

