Quick take: Baby proofing your bathroom isn’t just about locks and latches—it’s about creating a space where your curious crawler can explore safely. Start before your baby is mobile (around 6 months), focus on drowning risks, scalding, and toxic substances, and use a mix of hardware fixes and smart habits. This 2026 guide covers every corner, from toilets to tiny crevices, with updated product picks and space-saving hacks for small bathrooms.
You’re standing in the bathroom, toothbrush in hand, when it hits you: the cabinet under the sink is a treasure trove of cleaning sprays, the toilet is a gaping portal, and the bathtub faucet looks like a perfect climbing rung. If your baby is already army-crawling toward the door, you’re officially in the danger zone. But don’t panic—baby proofing a bathroom isn’t about turning it into a sterile cell. It’s about layering safety so your little explorer can splash, play, and grow without risking serious harm.
This guide is your step-by-step playbook for 2026 safety standards. We’ll walk through every hazard (yes, even the ones you haven’t thought of), share the best products that actually work, and give you budget-friendly DIY fixes for renters or small spaces. By the end, you’ll know exactly when to start, what to buy, and how to keep your bathroom safe as your child grows—without sacrificing style or sanity.
When to Start Baby Proofing the Bathroom for Crawling Infants
You don’t need to wait until your baby is mobile to start baby proofing. In fact, the American Academy of Pediatrics (AAP) recommends beginning as early as 4–6 months—before your baby can crawl but when they’re starting to roll, scoot, or pull up. Why? Because once they’re on the move, you’ll be playing catch-up, and bathrooms are one of the most hazardous rooms in the house.
Here’s a quick timeline to follow:
- 4–6 months: Install outlet covers, secure cabinets with locks, and move cleaning supplies to high shelves. Babies this age can roll into dangerous areas or grab objects within reach.
- 6–9 months: Add toilet locks, non-slip mats, and faucet covers. This is when babies start crawling and pulling up on furniture, putting them at risk for drowning, scalding, or falls.
- 9–12 months: Reassess locks and latches as your baby becomes stronger and more determined. Toddlers can often figure out simple locks, so upgrade to more secure options if needed.
- 12+ months: Teach bathroom safety rules (e.g., "no touching the toilet") and supervise closely. Even with baby proofing, never leave a child under 4 unattended in the bathroom.
One mom, Sarah, shared her wake-up call: "I thought I had time until my 7-month-old rolled right into the bathroom while I was brushing my teeth. She grabbed a bottle of mouthwash and took a swig before I could stop her. Thankfully, it was non-toxic, but it could’ve been much worse. Now, the bathroom door stays closed unless we’re in there together."
If you’re pregnant and reading this, start baby proofing during your second trimester. It’s easier to install locks and mats when you’re not sleep-deprived and chasing a crawler. Plus, you’ll have peace of mind knowing your home is ready for your little one’s arrival. (If you’re curious about how your baby is growing during pregnancy, check out our guide on 18 weeks pregnant baby size.)
How to Baby Proof a Bathroom Step by Step for 2026 Safety Standards
Baby proofing a bathroom isn’t a one-and-done task—it’s a series of small, intentional steps. Below, we’ll break it down by area, from the floor to the ceiling, with the latest safety standards and product recommendations for 2026. Grab a notebook (or your phone) and walk through your bathroom as you read. What needs fixing?
Step 1: Secure the Floor
The bathroom floor is ground zero for slips and falls. Here’s how to make it safer:
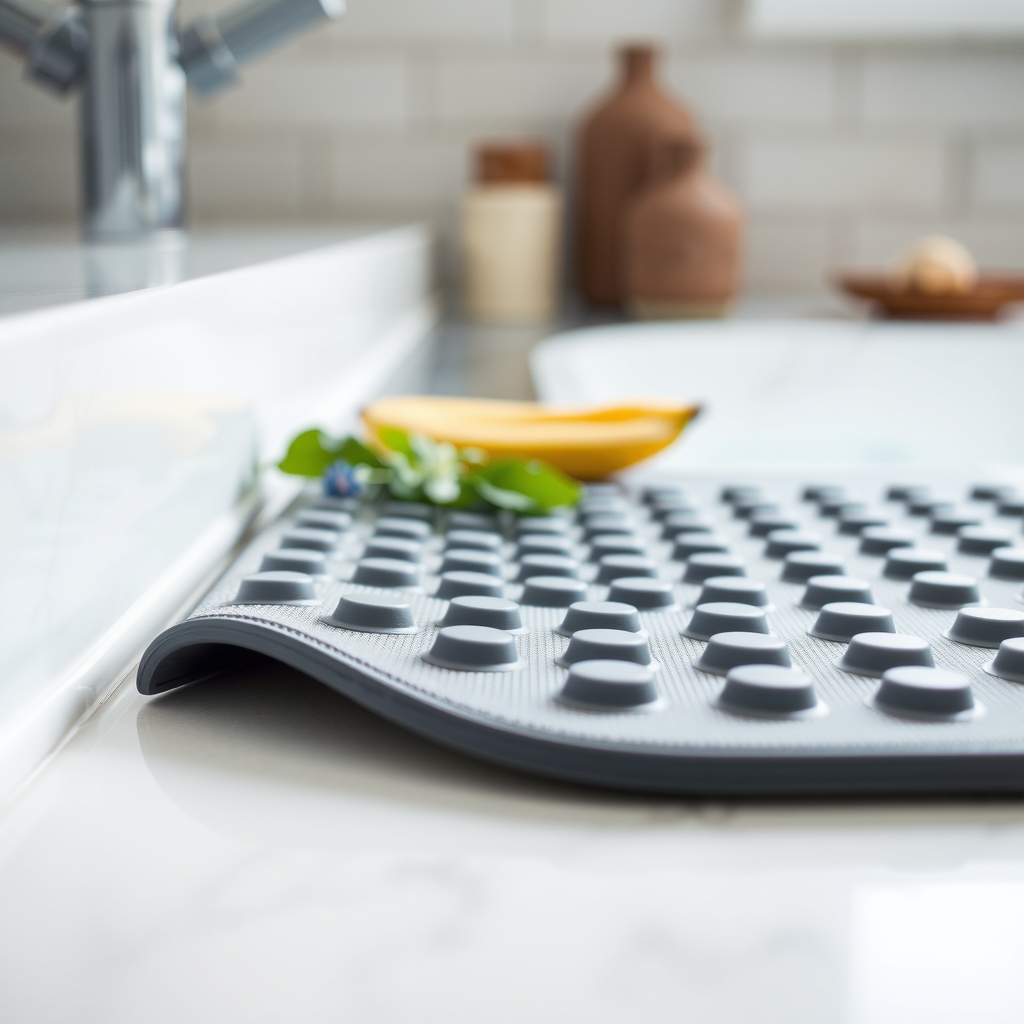
- Non-slip mats: Place a textured, non-slip mat outside the tub/shower and in front of the sink. Look for mats with a suction base or rubber backing to prevent sliding. (We’ll dive into the best options in the next section.)
- Rugs with grip: If you use bath mats or rugs, choose ones with a non-slip pad underneath. Avoid plush rugs that can bunch up and become a tripping hazard.
- Drain any standing water: Wipe up spills immediately. Even a small puddle can cause a slip.
- Check for loose tiles: If you have tile flooring, ensure none are cracked or loose, as they can pose a tripping hazard.
Step 2: Lock Down Cabinets and Drawers
Cabinets and drawers are like treasure chests to babies—full of colorful bottles, shiny objects, and mysterious liquids. Here’s how to keep them out:
- Magnetic locks: These are invisible from the outside and require a magnetic key to open. They’re great for cabinets but can be tricky to install on drawers.
- Adhesive strap locks: These are easy to install (no drilling!) and work well for both cabinets and drawers. They’re also budget-friendly.
- Sliding locks: These work by sliding a latch to lock the cabinet or drawer. They’re durable but can be harder for adults to use.
- Move hazards up high: Store cleaning supplies, medications, and sharp objects in a high cabinet or a locked closet outside the bathroom. Never rely on "child-resistant" caps—curious toddlers can often open them.
Pro tip: Use the top shelves of your bathroom cabinets for items you use daily (like toothpaste or lotion) and reserve the lower shelves for baby-safe items (like extra towels or bath toys). This way, you won’t have to unlock cabinets constantly.
Step 3: Toilet Safety
Toilets are a drowning hazard for babies and toddlers. A child can drown in just a few inches of water, and toilets are the perfect height for little ones to lean in and fall headfirst. Here’s how to secure them:
- Toilet locks: Install a lock that prevents the lid from being lifted. There are several types:
- Adhesive locks: These stick to the inside of the lid and require you to press a button to open. They’re easy to install but may not be as secure as other options.
- Clamp locks: These clamp onto the toilet bowl and require a key to open. They’re more secure but can be bulkier.
- Lid locks: These lock the lid to the seat. They’re simple but may not fit all toilet models.
- Keep the bathroom door closed: The easiest way to prevent toilet access is to keep the door shut. Use a doorknob cover or a door lock to keep your child out when you’re not in the room.
- Supervise always: Even with a lock, never leave your child unattended in the bathroom. A determined toddler can often figure out how to open a lock.
Step 4: Prevent Scalding
Hot water can cause third-degree burns in seconds. Here’s how to protect your child:
- Adjust your water heater: Set your water heater to 120°F (49°C) or lower. This is the Consumer Product Safety Commission (CPSC) recommended temperature to prevent scalding. If you’re not sure how to adjust it, ask your landlord or a plumber for help.
- Install anti-scald devices: These devices (like thermostatic mixing valves) automatically regulate water temperature to prevent sudden spikes of hot water.
- Test the water: Always test bath water with your elbow or a bath thermometer before placing your child in the tub. The water should feel warm, not hot.
- Faucet covers: Use a soft, cushioned faucet cover to prevent bumps and burns. Some covers also have built-in thermometers to monitor water temperature.
Step 5: Secure the Bathtub and Shower
The bathtub is one of the most dangerous places in the bathroom. Here’s how to make it safer:
- Non-slip mat: Place a non-slip mat in the tub to prevent slips. Look for one with strong suction cups to keep it in place.
- Faucet cover: As mentioned above, a cushioned faucet cover prevents bumps and burns.
- Shower door locks: If you have a walk-in shower with a glass door, install a lock to prevent your child from opening it. Some locks are designed specifically for glass doors.
- Drain any standing water: After bath time, drain the tub immediately. Never leave water in the tub, even if it’s just a few inches.
- Supervise always: Never leave your child unattended in the tub, even for a second. Drowning can happen in less than a minute.
Step 6: Electrical Safety
Water and electricity don’t mix. Here’s how to keep your child safe:
- Outlet covers: Install outlet covers on all electrical outlets. Choose ones that are difficult for little fingers to remove.
- Keep appliances unplugged: Store hairdryers, curling irons, and other appliances in a high cabinet or locked drawer. Never leave them plugged in, even if they’re turned off.
- Ground-fault circuit interrupter (GFCI): Ensure your bathroom outlets are GFCI-protected. These outlets automatically shut off if they detect a ground fault, preventing electric shocks. If your bathroom outlets aren’t GFCI-protected, hire an electrician to install them.
Step 7: Baby Proof the Door
Bathroom doors can pose several risks, from pinched fingers to locked-in toddlers. Here’s how to secure them:
- Doorknob covers: These covers make it difficult for little hands to turn the doorknob. They’re easy to install and remove when needed.
- Door locks: Install a lock high up on the door (out of your child’s reach) to keep them out of the bathroom when you’re not around. Some locks are designed to be childproof but easy for adults to open.
- Door pinch guards: These guards prevent little fingers from getting pinched in the door hinge. They’re especially useful if your bathroom door swings open into a hallway.
- Keep the door closed: The simplest solution is to keep the bathroom door closed at all times. Use a hook-and-eye latch or a doorstop to keep it from swinging open.
Step 8: Check for Hidden Hazards
Some bathroom hazards aren’t obvious. Here’s what to look for:
- Small objects: Keep small objects (like bobby pins, cotton swabs, or jewelry) out of reach. These can be choking hazards.
- Sharp edges: Cover sharp corners on countertops, cabinets, or shelves with corner guards. These are soft, cushioned covers that prevent bumps and bruises.
- Loose cords: Secure any loose cords (like those from electric razors or hair straighteners) with cord shorteners or clips. These can pose a strangulation hazard.
- Medications: Store all medications (even vitamins) in a locked cabinet or high shelf. Never leave them on the counter, even for a minute.
- Trash cans: Use a trash can with a lid or store it in a locked cabinet. Babies love to dig through trash, and bathroom trash often contains hazardous items (like razors or medication packaging).
Best Non-Slip Bathroom Mats for Baby Proofing in 2026
A good non-slip mat is your first line of defense against falls. But not all mats are created equal. Here are the top picks for 2026, based on safety, durability, and ease of cleaning:
When choosing a mat, look for these features:
- Suction cups or non-slip backing: The mat should stay firmly in place, even when wet.
- Quick-dry material: Mats that retain water can become slippery or grow mold. Look for materials like microfiber or quick-dry polyester.
- Machine-washable: Bathroom mats get dirty fast. Choose one you can toss in the washing machine.
- Size: Measure your space before buying. The mat should cover the area where your child stands or sits.
Pro tip: If you’re renting or don’t want to buy a new mat, place a towel or yoga mat on the floor for extra grip. Just make sure it’s secured with a non-slip pad underneath.
How to Secure Bathroom Cabinets and Drawers from Toddlers
Cabinets and drawers are like puzzles to toddlers—full of knobs to turn, handles to pull, and secrets to uncover. Here’s how to keep them securely closed:
Types of Cabinet Locks
Not all cabinet locks are created equal. Here’s a breakdown of the most common types, along with their pros and cons:
How to Install Cabinet Locks
Installing cabinet locks is easier than you think. Here’s a step-by-step guide for the most common types:
Adhesive Strap Locks
- Clean the surface of the cabinet or drawer with rubbing alcohol to remove dirt and oils.
- Peel the backing off the adhesive strips and press them firmly onto the cabinet or drawer.
- Attach the strap to the adhesive strips and press down to secure.
- Test the lock to make sure it’s secure. If it’s not, press the adhesive strips down harder or replace them.
Magnetic Locks
- Open the cabinet and hold the lock in place on the inside of the door. Mark the screw holes with a pencil.
- Drill pilot holes at the marked spots.
- Screw the lock into place.
- Close the cabinet and test the lock with the magnetic key.
Sliding Locks
- Hold the lock in place on the inside of the cabinet or drawer. Mark the screw holes with a pencil.
- Drill pilot holes at the marked spots.
- Screw the lock into place.
- Slide the latch to lock the cabinet or drawer.
DIY Cabinet Lock Hacks
If you’re on a budget or need a temporary fix, try these DIY hacks:
- Rubber bands: Loop a thick rubber band around the cabinet knobs to keep them closed. This isn’t the most secure option, but it can work in a pinch.
- Bungee cords: Stretch a bungee cord between two cabinet knobs to keep them closed. Make sure the cord is tight and out of your child’s reach.
- Shoe laces: Tie a shoelace around the cabinet knobs to keep them closed. Double-knot the lace to make it more secure.
- Command hooks: Stick a Command hook to the inside of the cabinet door and loop a rubber band or shoelace around it to create a makeshift lock.
Pro tip: If you’re renting and can’t install permanent locks, use a combination of adhesive strap locks and DIY hacks. Store hazardous items in a high cabinet or a locked closet outside the bathroom.
Are Toilet Locks Necessary for Baby Proofing and Which Types Work Best?
You might be thinking, "Does my baby really need a toilet lock?" The short answer: yes. Toilets are one of the most dangerous fixtures in the bathroom for several reasons:
- Drowning risk: A child can drown in as little as 1–2 inches of water. Toilets are the perfect height for a curious toddler to lean in and fall headfirst.
- Germs: Toilets are full of bacteria. Even if your child doesn’t drown, they could get sick from touching the water or bowl.
- Choking hazards: Toddlers love to drop things into the toilet—like toys, jewelry, or even their own fingers. A lock prevents them from accessing the bowl.
- Cleaning supplies: If you store cleaning tablets or brushes in the toilet tank, a lock keeps your child from accessing them.
The Consumer Product Safety Commission (CPSC) reports that toilets are responsible for thousands of injuries each year, from drowning to chemical burns. A toilet lock is a small investment that can prevent a major tragedy.
Types of Toilet Locks
Not all toilet locks are created equal. Here are the most common types, along with their pros and cons:
How to Install a Toilet Lock
Installing a toilet lock is simple. Here’s how to do it for the most common types:
Adhesive Lid Locks
- Clean the inside of the toilet lid with rubbing alcohol to remove dirt and oils.
- Peel the backing off the adhesive strip and press it firmly onto the lid.
- Attach the lock to the adhesive strip and press down to secure.
- Test the lock to make sure it’s secure. If it’s not, press the adhesive strip down harder or replace it.
Clamp Locks
- Place the clamp around the toilet bowl, just below the seat.
- Tighten the clamp until it’s snug but not too tight (you don’t want to crack the porcelain).
- Insert the key into the lock and turn it to secure.
- Test the lock to make sure it’s secure.
Lid Locks
- Place the lock on the lid and seat, aligning the holes with the toilet bolts.
- Insert the bolts through the holes and tighten them with a screwdriver.
- Test the lock to make sure it’s secure.
Toilet Lock Alternatives
If you don’t want to use a lock, here are a few alternatives:
- Keep the bathroom door closed: The easiest way to prevent toilet access is to keep the door shut. Use a doorknob cover or a door lock to keep your child out when you’re not in the room.
- Use a toilet seat latch: Some toilet seats come with built-in latches that keep the seat down. These aren’t as secure as a lock but can work in a pinch.
- Store the toilet brush out of reach: If you keep a toilet brush in the tank, move it to a high shelf or a locked cabinet.
Pro tip: Even with a lock, never leave your child unattended in the bathroom. A determined toddler can often figure out how to open a lock, and accidents can happen in seconds.
How to Prevent Scalding in the Bathroom for Babies and Toddlers
Hot water is one of the most underestimated hazards in the bathroom. According to the Centers for Disease Control and Prevention (CDC), scalding is a leading cause of burn injuries in children under 5. A child’s skin is thinner than an adult’s, which means it burns faster and more severely. Here’s how to protect your little one:
Adjust Your Water Heater
The first step is to adjust your water heater to a safe temperature. The Consumer Product Safety Commission (CPSC) recommends setting your water heater to 120°F (49°C) or lower. At this temperature, it takes about 5 minutes for water to cause a third-degree burn. At 140°F (60°C), it takes just 3 seconds.
Here’s how to adjust your water heater:
- Locate your water heater: It’s usually in the basement, garage, or a utility closet.
- Find the temperature dial: It’s typically on the front of the water heater, near the bottom. If you’re not sure, check the manual or look for a label on the heater.
- Turn off the power: If your water heater is electric, turn off the power at the circuit breaker. If it’s gas, turn the dial to "pilot."
- Adjust the temperature: Use a flathead screwdriver to turn the dial to 120°F (49°C). Some dials have markings, while others require you to estimate.
- Turn the power back on: Wait about 3 hours for the water to heat up to the new temperature.
- Test the water: Use a thermometer to check the temperature at a faucet. If it’s not 120°F (49°C), adjust the dial again.
If you’re renting or can’t access your water heater, ask your landlord to adjust it for you. Most landlords are happy to comply with safety requests.
Install Anti-Scald Devices
Even with a properly set water heater, sudden changes in water pressure (like when someone flushes the toilet) can cause scalding. Anti-scald devices prevent this by regulating the water temperature. Here are the most common types:
- Thermostatic mixing valves: These valves mix hot and cold water to maintain a consistent temperature. They’re installed at the water heater or under the sink.
- Pressure-balancing valves: These valves adjust the water pressure to prevent sudden temperature changes. They’re installed in the shower or tub faucet.
- Anti-scald faucets: These faucets have built-in temperature regulators to prevent scalding. They’re a good option for sinks and tubs.
Pro tip: If you’re not comfortable installing a valve yourself, hire a plumber. It’s a small investment that can prevent serious injuries.
Use Faucet Covers
Faucet covers serve two purposes: they prevent bumps and burns. Here’s what to look for:
- Soft, cushioned material: The cover should be made of foam or rubber to prevent injuries.
- Easy to install: Look for covers that slip over the faucet or attach with suction cups.
- Built-in thermometer: Some covers have a built-in thermometer to monitor water temperature.
- Fun designs: Covers with animal or cartoon designs can make bath time more enjoyable for your child.
Here are a few top picks for 2026:
- Skip Hop Zoo Faucet Cover: Cute animal designs, easy to install, built-in thermometer.
- Munchkin White Hot Safety Duck Bath Faucet Cover: Changes color when the water is too hot, soft foam material.
- Boon Pivot Faucet Cover: Adjustable to fit most faucets, easy to install, fun colors.
Test the Water Before Bath Time
Even with anti-scald devices and faucet covers, always test the water before placing your child in the tub. Here’s how:
- Use your elbow: The skin on your elbow is more sensitive to temperature than your hands. Dip your elbow into the water—it should feel warm, not hot.
- Use a bath thermometer: These floating thermometers give you an exact temperature reading. The water should be between 98°F and 100°F (37°C and 38°C).
- Run the cold water first: When filling the tub, run the cold water first, then add hot water. This prevents the tub from getting too hot.
Teach Your Child About Hot Water
As your child grows, teach them about the dangers of hot water. Here’s how:
- Use simple language: "Hot water can hurt you. Always ask a grown-up before touching the faucet."
- Demonstrate: Turn on the hot water and let your child feel the steam (from a safe distance). Explain that the water inside is even hotter.
- Praise safe behavior: When your child follows the rules, praise them. "Great job asking before touching the faucet!"
Baby Proofing Bathroom Doors: Locks, Latches, and Safety Tips
The bathroom door is often overlooked in baby proofing, but it can pose several risks:
- Pinched fingers: Little fingers