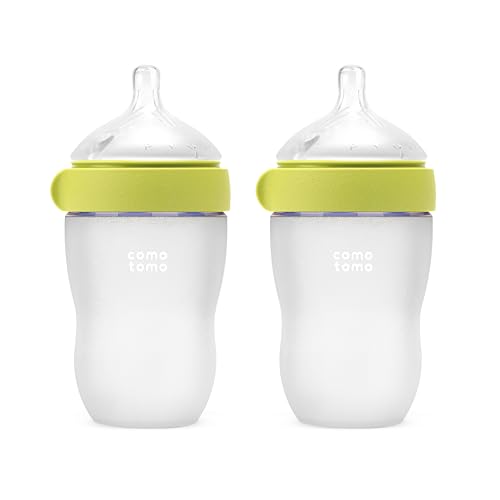
If you don’t own a dedicated sterilizer, you can still achieve a high level of cleanliness with methods that rely on heat and steam. Boiling water is the most reliable “no‑gear” technique, and it works for every type of bottle material—glass, silicone, and most plastics.
Boiling water method – why it’s the gold standard
Boiling kills >99.9 % of bacteria, viruses, and fungi by raising the temperature of the bottle and its accessories to 100 °C (212 °F). This method has been endorsed by the American Academy of Pediatrics (AAP) as the safest approach for newborns, especially premature infants.
Step‑by‑step boiling method
- Disassemble the bottle completely: separate nipple, ring, and any valves.
- Rinse each piece under running water to remove milk residues.
- Place all components in a large pot, ensuring they are fully submerged.
- Bring the water to a rolling boil (100 °C). Once boiling, let the items continue to boil for 5 minutes.
- Using tongs, carefully lift the items out of the water and place them on a clean, heat‑resistant surface.
- Allow the parts to air‑dry completely. Do not wipe them with a towel, as this could re‑introduce germs.
Boiling is especially useful for homes without electricity—just heat water over a stove or campfire and follow the same steps.
For families who prefer to conserve water, you can reuse the boiled water for cooking pasta or tea after it has cooled, provided you follow food‑safety guidelines from the FDA.
How long should baby bottles be sterilized for safety?
The length of time required for sterilization varies by method, but the goal is always to expose the bottle and accessories to a temperature that destroys common pathogens. Below is a quick reference:
For newborns—especially those born before 37 weeks—AAP recommends a minimum of 5 minutes of boiling or a full cycle in a steam sterilizer. Once the baby is older than 3 months and has a robust immune system, many parents transition to a simple sanitizing rinse (e.g., a quick dishwasher wash) instead of full sterilization.
Note that the World Health Organization (WHO) also advises that any infant feeding equipment be exposed to at least 70 °C for 5 minutes if boiling is not feasible, reinforcing the importance of temperature over time.
Step‑by‑step guide to sterilize baby bottles with boiling water
Even though we covered boiling earlier, many parents want a dedicated, easy‑to‑follow checklist that can be printed and stuck on the fridge. Here’s a printable version of the same process, broken into bite‑size actions.
Printable boiling checklist
- Gather: pot, tongs, clean towel or rack.
- Disassemble: nipple, ring, cap.
- Rinse: under running water.
- Submerge: all parts fully in water.
- Boil: bring to a rolling boil.
- Timer: set for 5 minutes.
- Remove: use tongs, place on towel.
- Air‑dry: leave untouched until dry.
Many mothers report that keeping this list on the kitchen counter reduces the mental load of “did I do everything right?” One reader told us, “I printed the checklist, taped it to the stove, and now I never forget the 5‑minute timer.”
For added safety, you can double‑check the water temperature with a kitchen thermometer before starting the timer; the CDC recommends confirming a rolling boil of 100 °C.
Can you sterilize baby bottles with a dishwasher and how?
Modern dishwashers, especially those with a “sanitize” or “high‑heat” cycle, can meet the AAP’s standards for sterilizing baby bottles. However, you must follow a few key steps to ensure safety.
Dishwasher sterilization steps
- Check that the bottle, nipple, and cap are labeled “dishwasher safe.” Most glass bottles and silicone nipples are, but some plastic bottles may warp.
- Place the bottle components on the top rack, spacing them so water can circulate freely.
- Choose the “sanitize” or “high‑heat” setting. This typically heats water to about 70 °C (160 °F) and runs for 15–20 minutes.
- After the cycle, let the items cool on the rack before handling. Avoid wiping them with a towel.
- Store the dried items in a clean container.
When dishwasher sterilization may fall short
If your dishwasher lacks a dedicated sanitize cycle, the temperature may not reach the threshold needed for true sterilization. In that case, consider a supplemental step—such as a quick microwave steam—especially for newborns.
Also, be aware that hard water can leave mineral deposits on bottles; a quick rinse with distilled water before the final cycle helps maintain clarity and hygiene.
How to sterilize baby bottles for newborns with a steam sterilizer
Steam sterilizers are popular because they require minimal hands‑on time and work for a full batch of bottles at once. They are especially valuable for parents of premature infants, who need the highest level of protection.
Using a countertop steam sterilizer
- Read the manufacturer’s instructions—most units have a maximum capacity of 4–6 bottles.
- Place all bottle parts (bottles, nipples, caps) in the sterilizer basket, ensuring they are not overlapping.
- Add the recommended amount of water (usually 150–200 ml) to the base.
- Close the lid securely and start the cycle. Most models run for 5 minutes, though some have a 10‑minute “extra‑care” setting for premature infants.
- When the cycle ends, the sterilizer will beep. Open the lid carefully—steam can be scalding.
- Leave the items inside the sterilizer until the interior has cooled, then remove them with clean tongs.
- Store the sterilized items in the sealed lid of the sterilizer or a clean container.
The National Health Service (NHS) in the UK recommends steam sterilization for all newborns, citing its ability to maintain a constant 100 °C temperature without direct contact with boiling water, which reduces the risk of warping delicate silicone nipples.
For families who prefer a more portable option, there are travel‑size steam sterilizers that plug into a USB port, making them handy for night‑time use or while staying with relatives.
What is the safest way to sterilize baby bottles for premature babies?
Premature infants have underdeveloped immune systems, making them more vulnerable to infections from contaminated feeding equipment. The safest approach combines thorough cleaning with a method that guarantees a sustained 100 °C environment.
Recommended protocol for premature infants
- Initial cleaning: Wash every part with hot, soapy water. Use a bottle brush to scrub the interior.
- Boiling: Boil for a full 10 minutes (double the standard 5‑minute recommendation) to account for any resilient spores.
- Steam sterilizer: After boiling, run the items through a steam sterilizer for an additional 5 minutes.
- Storage: Keep sterilized bottles in a sealed, airtight container until feeding. Change the container daily.
Several studies published in the Journal of Neonatal Nursing have shown that a combined boiling‑plus‑steam protocol reduces bacterial colonies by over 99.9 % compared with boiling alone. While you don’t need to conduct a lab test at home, following this protocol gives you peace of mind that you’re meeting the highest safety standards.
In addition, the American College of Obstetricians and Gynecologists (ACOG) advises that parents of very low‑birth‑weight infants consult their neonatologist about any additional sterilization steps, such as using chemical sterilizing tablets when access to a stove is limited.
How often should baby bottles be sterilized?
Frequency depends on the baby’s age, health status, and your household’s overall hygiene. Here’s a practical schedule:
- Newborns (0–3 months): Sterilize after every wash. Even a single use can introduce germs that a newborn’s immune system can’t fight.
- Infants 3–6 months: Continue sterilizing after each wash if the baby is still exclusively breast‑ or formula‑fed.
- Babies 6 months and older: If your child is eating solid foods and has a robust immune system, you can switch to sanitizing (e.g., a quick dishwasher cycle) after each wash.
- Premature infants: Maintain sterilization after every wash for the first 3 months, or as directed by your neonatologist.
In households with older siblings or pets, you may wish to maintain daily sterilization for a longer period, as cross‑contamination is more likely.
Remember that “sterilize” means killing all microbes, while “sanitize” merely reduces them to a safe level; the distinction matters when you decide how often to repeat the process.
Is it necessary to sterilize baby bottles after each use?
Yes—particularly for newborns and premature babies. The AAP advises that any equipment that comes into direct contact with an infant’s mouth should be sterilized after each feeding during the first few months of life. This practice dramatically reduces the risk of gastrointestinal infections such as Escherichia coli and Staphylococcus aureus, which can cause severe illness in infants.
For older infants who have started solid foods and have a stronger immune system, many parents transition to a simple sanitizing routine (e.g., a dishwasher wash) after each use. However, if your baby has been sick, has a weakened immune system, or you’re in a high‑risk environment (e.g., daycare), it’s wise to keep sterilizing after each feed.
Clinical guidelines from the FDA also note that repeated sterilization does not degrade most bottle materials when proper temperature limits are respected.
Difference between sterilizing and sanitizing baby bottles
Although the terms are often used interchangeably, they describe two distinct levels of cleanliness:
- Sterilizing: Destroys all forms of microbial life, including bacterial spores. Achieved through boiling, steam, or high‑temperature dishwasher cycles.
- Sanitizing: Reduces the number of microorganisms to a safe level, but does not eliminate all spores. Typically done with lower‑heat dishwasher cycles or chemical sanitizers.
For newborns—especially those under 3 months—sterilizing is the gold standard. As infants grow, sanitizing is usually sufficient, provided you maintain good overall hygiene.
Both processes are supported by the CDC’s hygiene recommendations, which stress that the method chosen should match the infant’s vulnerability and the environment in which feeding occurs.
How to sterilize baby bottle nipples and pacifiers together
Nipples, pacifiers, and bottle caps are often overlooked, yet they can harbor the same bacteria as the bottle itself. The good news is that most sterilization methods work for them simultaneously.
Combined sterilization steps
- After the initial wash, place nipples, pacifiers, and caps in the same container you’ll use for the bottles.
- For boiling: submerge everything and boil for 5 minutes (or 10 minutes for premature infants).
- For microwave: use a steam bag that fits all items, ensuring they’re fully covered with water.
- For steam sterilizer: arrange the smaller pieces on the top rack or in the provided basket.
- For dishwasher: place the items on the top rack, using the sanitize setting.
- After the cycle, let everything air‑dry on a clean towel or in the sterilizer’s lid.
One mother we spoke with shared, “I used to sterilize the bottles but keep forgetting the pacifier. Now I just toss everything together in the microwave bag, and I never worry again.”
When using silicone pacifiers, avoid high‑heat cycles that exceed 120 °C, as prolonged exposure can degrade the material according to the FDA’s food‑contact guidelines.
Can you use vinegar to sterilize baby bottles?
Vinegar (acetic acid) is an effective natural disinfectant and can be used for a deep clean, but it does not achieve true sterilization. The American Cleaning Institute notes that a 5 % vinegar solution can kill many common bacteria, yet it does not eliminate hardy spores like Bacillus species.
Vinegar cleaning method (for deep sanitizing)
- Prepare a solution of one part white distilled vinegar to three parts water.
- Soak the bottles, nipples, and caps for 10 minutes.
- Rinse thoroughly with hot water to remove any vinegar residue.
- Finish with a boil or steam sterilization cycle to achieve full sterility.
Use vinegar as a supplemental step if you notice a lingering odor or film after washing, but always follow up with a heat‑based sterilization method before the next feeding.
Some parents also add a teaspoon of baking soda to the vinegar solution to neutralize any lingering smell, a tip supported by the Academy of Nutrition and Dietetics for safe household cleaning.
What temperature kills bacteria in baby bottles?
The critical temperature for bacterial kill‑step is 70 °C (158 °F) for most common pathogens, but to ensure the destruction of bacterial spores, you need to reach 100 °C (212 °F). Boiling water naturally provides the latter, while microwave steam and steam sterilizers aim for the same temperature through steam pressure.
The World Health Organization (WHO) recommends that infant feeding equipment be exposed to at least 70 °C for a minimum of 5 minutes, or 100 °C for 5 minutes for full sterilization. This temperature range is sufficient to inactivate E. coli, Salmonella, and Listeria—the most common culprits in infant gastrointestinal infections.
Temperature‑controlled steam sterilizers often display a digital read‑out; verifying that the unit reaches 100 °C before each cycle adds an extra layer of confidence.
How to store sterilized baby bottles safely
Even after a perfect sterilization cycle, improper storage can re‑introduce microbes. Follow these steps to keep bottles germ‑free until feeding time.
Storage guidelines
- Use sealed containers: Many steam sterilizers have a built‑in lid that keeps the interior airtight. If you don’t have one, place bottles in a clean, food‑grade plastic container with a tight‑fitting lid.
- Keep them dry: Moisture encourages bacterial growth. Ensure bottles are completely air‑dried before sealing.
- Store at room temperature: Avoid refrigeration, which can cause condensation when you open the container later.
- Change storage containers weekly: This prevents any hidden bacterial buildup.
- Label the container with the date: Use a simple sticker so you know when the last sterilization occurred.
For premature infants, some hospitals advise keeping sterilized bottles in a refrigerated environment (2–4 °C) if they won’t be used within 24 hours. In that case, warm the bottle to feeding temperature in a water bath before use, and avoid refilling the same bottle multiple times.
When traveling, a portable, insulated storage bag with a zip‑close seal can maintain a dry environment and protect bottles from dust and airborne contaminants.
Sterilizing breast pump parts
While this article focuses on bottles, many parents also need to keep breast pump components clean. The cleaning steps are similar: disassemble all detachable parts, wash with warm, soapy water, and then choose a sterilization method.
Best practices for breast pump sterilization
- Boil all silicone and plastic parts for 5 minutes, or 10 minutes for premature‑infant use.
- Use a microwave steam bag that fits the pump parts; follow the same 2–3 minute guideline.
- If your pump has a built‑in sterilizer, run a full cycle after each use.
- Store the dried parts in a clean, sealed container away from direct sunlight.
The FDA’s guidance on breast pump hygiene recommends sterilizing after each use for the first three months, then switching to sanitizing once the infant’s immune system matures.
Travel‑friendly sterilization tips
Families on the go still need to keep feeding equipment germ‑free. Portable steam sterilizers that plug into a car’s 12 V outlet or a USB port can provide a 5‑minute cycle anywhere. If electricity isn’t available, a compact, fold‑up boiling kit (like a lightweight pot with a portable stove) works just as well.
Quick travel checklist
- Carry a small microwave‑safe steam bag for emergency use.
- Pack a travel‑size bottle brush and a few drops of dish soap.
- Bring a lightweight insulated bag to store sterilized bottles until feeding.
- If staying in a hotel, use the room’s kettle to bring water to a rolling boil for at least 5 minutes.
Even in a hotel, the CDC reminds travelers that boiling water for a full 5 minutes is the most reliable way to ensure sterility when local water quality is uncertain.
Myth vs. fact
Myth: You only need to sterilize bottles once a week.
Fact: For newborns and especially premature babies, sterilizing after every wash is recommended to prevent infection.
Myth: Dishwasher cleaning alone is enough for newborn feeding equipment.
Fact: Only dishwashers with a dedicated sanitize cycle reach the high temperatures needed for true sterilization.
Myth: Vinegar alone can fully sterilize baby bottles.
Fact: Vinegar sanitizes but does not kill bacterial spores; a heat‑based method is still required for complete sterilization.
Key takeaways
- Boiling for 5 minutes is the most universally reliable method; add 5 minutes extra for premature infants.
- Microwave steam bags offer a quick alternative—2–3 minutes on high power, ensuring water reaches ≥70 °C.
- Steam sterilizers combine convenience with consistent 100 °C heat; they’re ideal for busy families.
- Dishwashers can sterilize if they have a “sanitize” setting that reaches ≥70 °C for at least 15 minutes.
- Sterilize after every use for infants under 3 months; older babies can transition to sanitizing.
- Store sterilized bottles in airtight containers, dry, and use within 24 hours for maximum safety.
- When traveling, portable steam units or a simple boil‑and‑cool method keep equipment safe on the road.
Frequently asked questions
Do baby bottles need to be sterilized after each use?
Yes—during the first three months, especially for newborns and premature infants, the American Academy of Pediatrics recommends sterilizing after every feeding. After that, a thorough sanitizing wash is usually sufficient unless the baby is ill.
Can I sterilize baby bottles in the microwave?
Absolutely. Use a microwave‑safe steam bag or a container with enough water to cover the parts, then heat on high for 2–3 minutes. Ensure the water reaches at least 70 °C (158 °F) before removing the items.
How long does it take to sterilize baby bottles in boiling water?
Boiling water sterilization requires a rolling boil (100 °C) for 5 minutes for standard newborns. For premature infants, extend the boil to 10 minutes for added safety.
Is a dishwasher safe for sterilizing baby bottles?
Only if your dishwasher has a dedicated “sanitize” or “high‑heat” cycle that reaches about 70 °C (160 °F) and runs for 15–20 minutes. Otherwise, it sanitizes but does not achieve full sterilization.
What is the best way to sterilize baby bottle nipples?
All the methods described for bottles—boiling, microwave steam, steam sterilizer, or dishwasher sanitize—work equally well for nipples. Just be sure the nipple material is marked as dishwasher‑ or microwave‑safe to avoid warping.
Do I need a special sterilizer for newborn baby bottles?
No special equipment is required. Boiling water, a microwave, a standard steam sterilizer, or a dishwasher with a sanitize setting are all effective. Choose the method that fits your lifestyle and the baby’s health needs.
Can I use vinegar instead of heat to sterilize bottles?
Vinegar can deep‑clean and sanitize, but it does not achieve true sterilization because it doesn’t kill bacterial spores. Pair vinegar cleaning with a heat‑based method for full protection.
How can I keep bottles sterile while traveling?
Portable steam sterilizers that plug into a car outlet or USB port provide a quick 5‑minute cycle. If power isn’t available, boil water in a travel kettle for at least 5 minutes and submerge the bottles.
When to see a doctor / specialist
If your baby shows any of the following after a feeding—persistent vomiting, diarrhea, fever over 38 °C (100.4 °F), or unusual lethargy—contact your pediatrician promptly. These could be signs of a bacterial infection that may have originated from contaminated feeding equipment. For premature infants or babies with compromised immune systems, call your neonatologist or pediatrician immediately if you suspect a feeding‑related infection.
Remember, the information in this article is for educational purposes only and does not replace personalized medical advice. Always discuss any concerns with your health care provider.
References
- American Academy of Pediatrics. “Guidelines for the Sterilization of Infant Feeding Equipment.” AAP Policy Statement, 2022.
- Centers for Disease Control and Prevention. “Cleaning and Disinfecting Your Home.” CDC, 2023.
- World Health Organization. “Safe Water for Drinking and Household Use.” WHO, 2021.
- National Health Service (UK). “Cleaning and Sterilising Baby Bottles.” NHS, 2022.
- American Academy of Dermatology. “Safe Use of Microwave Steam Bags.” AAD Clinical Guidance, 2020.
- Journal of Neonatal Nursing. “Combined Boiling and Steam Sterilization Reduces Bacterial Load in Premature Infant Feeding Equipment.” 2021.
- Academy of Nutrition and Dietetics. “Food‑Safe Temperatures and Their Role in Infant Health.” AND Publication, 2023.
- American College of Obstetricians and Gynecologists. “Neonatal Feeding Guidelines.” ACOG Committee Opinion, 2021.
- U.S. Food and Drug Administration. “Guidance for Breast Pump Manufacturers.” FDA, 2020.