When it comes to storing baby clothes, the “best” solution balances durability, cost, and ease of access. Below is a quick comparison of three common options, plus a few lesser-known alternatives that might work better for your space.
All three options meet safety standards set by the Consumer Product Safety Commission (CPSC). Choose the one that fits your nursery layout and your visual preference. If you’re watching your budget, start with a couple of clear bins and add fabric containers as the wardrobe expands.
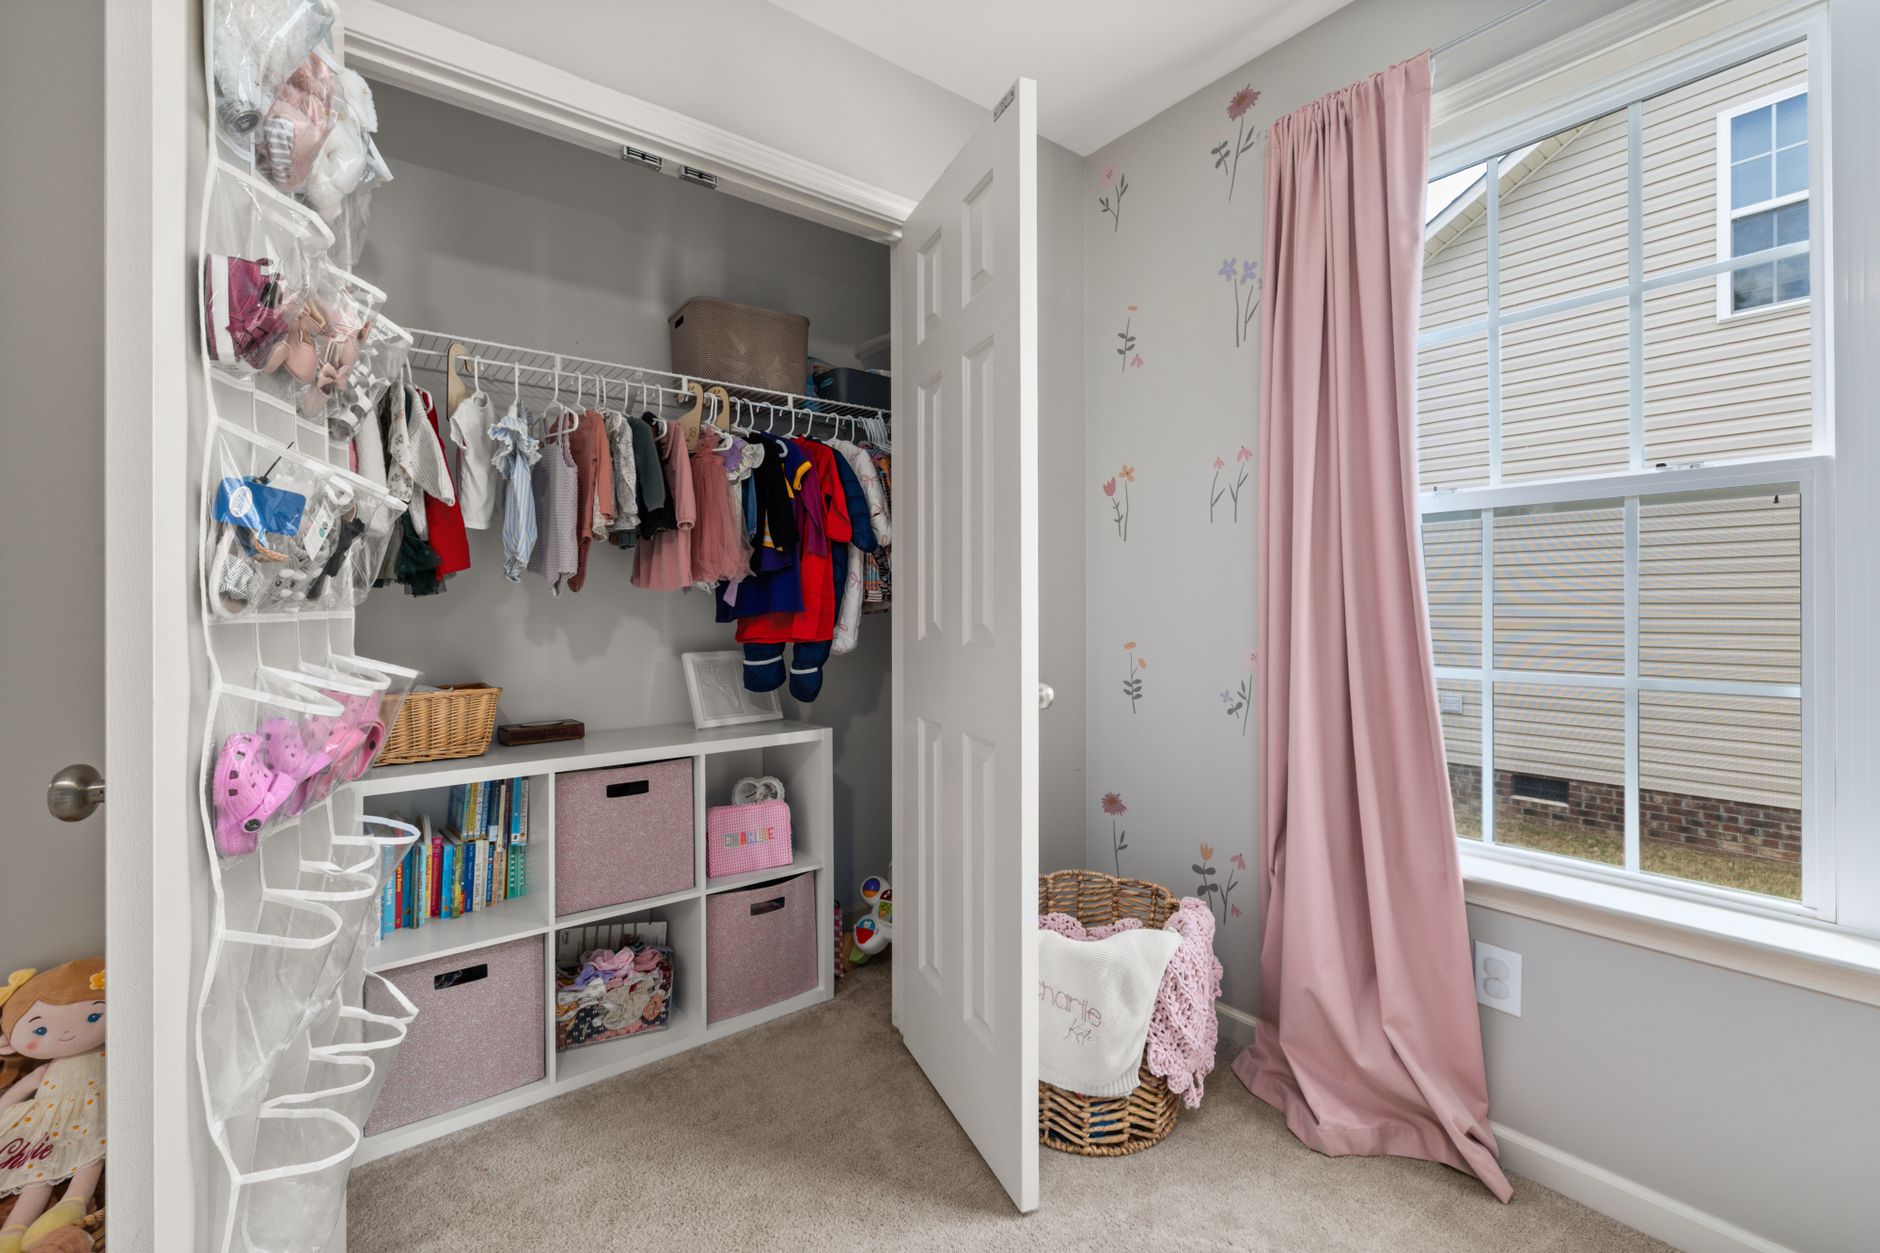
For families with limited closet space, a hanging sweater organizer can be a game-changer. These organizers have multiple compartments that can hold folded onesies, pajamas, or even blankets. They’re especially useful for shared closets, as they keep baby clothes separate from adult garments while still being easily accessible.
DIY baby clothing storage ideas
Repurpose clean shoe boxes by covering them with patterned contact paper. Add a label holder made from a small binder clip. This inexpensive hack gives you a uniform look while keeping each size separate. Another DIY favorite is a hanging shoe organizer turned sideways to hold rolled blankets and swaddles.
If you’re crafty, consider making your own fabric bins using old T-shirts or bedsheets. Cut the fabric into rectangles, sew the sides together, and add a cardboard or plastic bottom for structure. These bins are lightweight, washable, and can be customized to match your nursery decor.
For a no-sew option, use large plastic cereal containers. These are sturdy, stackable, and often free. Remove the top, clean the container thoroughly, and use it to store socks, mittens, or small accessories. Label the front with a piece of washi tape or a sticky note.
How to fold baby onesies efficiently (and keep them wrinkle-free)
Folding baby onesies the right way saves space and reduces ironing. Here’s a three-step method that works for most cotton and bamboo fabrics:
- Lay the onesie flat with the front facing up. Smooth out any wrinkles with one hand.
- Fold the sleeves toward the center, overlapping them slightly so the shoulders line up.
- Fold the body in half from the bottom hem up to the neckline. You should end up with a compact rectangle about 4–5 inches wide.
For bodysuits with snap-fasteners, gently close the snaps before folding to keep the shape. Store the folded pieces in a single-layer bin—stacking too many on top of each other can cause creases.
To prevent wrinkles when traveling, place a layer of tissue paper between each folded item. This simple barrier reduces friction and keeps fabrics fresh. If you’re short on tissue paper, use a clean cotton T-shirt or a thin dish towel as a substitute.
If you’re dealing with stubborn wrinkles, a quick trick is to hang the onesie in the bathroom while you shower. The steam will relax the fibers, making it easier to smooth out any creases. For a more permanent solution, consider using a handheld steamer. These are compact, easy to use, and can be stored in a small bin under the crib.
How to label baby clothing bins for easy access
Clear labeling cuts down the time you spend hunting for the right size. Use large, bold stickers or printable label sheets. Include the following details:
- Size range (e.g., “0–3 mo” or “3–6 mo”).
- Season (e.g., “Spring/Summer”).
- Category (e.g., “Onesies” vs “Pajamas”).
For a shared bedroom, color-code the labels—pastel yellow for daytime outfits, soft blue for nighttime garments. This visual cue helps everyone, from grandparents to night-shifts, locate items quickly. If you have multiple caregivers, consider adding a small photo of the type of clothing inside the bin (e.g., a picture of a onesie or a pair of socks) to make it even easier to identify.
If you’re using fabric bins that don’t have a hard surface, attach a small zippered pouch to the front of the bin and slide the label inside. The pouch protects the label from wear while staying visible. For a more durable option, use a label maker with waterproof labels. These are especially useful if you plan to store bins in a damp basement or garage.
Organizing baby clothes by season and rotating the closet
Babies outgrow clothes quickly, but seasonal changes still matter. Set up a simple rotation system:
- Separate current-season items into a “ready” bin placed at eye level.
- Store off-season pieces in a higher shelf or under-bed container labeled with the season.
- Every 2–3 months, pull the next season’s bin forward and push the old one back.
This method ensures you always have appropriate weather-ready outfits without digging through a mountain of fabric. For families living in milder climates, you can combine “warm” and “cool” bins and rotate them based on temperature rather than calendar month.
When you rotate, check each garment for wear. If a piece shows signs of fading, pilling, or lost elasticity, set it aside for donation. This maintains a high-quality wardrobe for your baby. To make the rotation process even smoother, keep a small notebook or digital note on your phone listing the contents of each bin. This way, you can quickly reference what’s in storage without having to pull everything out.
If you’re short on space, consider storing off-season clothes in vacuum-seal bags. These bags compress the fabric, reducing the amount of space they take up. They’re also great for protecting clothes from moisture, dust, and pests. Just be sure to label the bags clearly, as it can be difficult to see the contents once they’re sealed.
How to keep baby clothes organized while traveling
Travel introduces new challenges: limited luggage space, unpredictable weather, and the need for quick outfit changes. Follow these steps to keep the system you built at home working on the road.
Pack a portable “travel bin”
Choose a lightweight, zip-top bag that can hold a week’s worth of essentials. Inside, use small pouches for socks, onesies, and accessories. Label each pouch with the size (e.g., “3–6 mo”) so you can grab the right pieces without opening every compartment.
For longer trips, consider a packing cube set designed for baby clothes. These cubes come in different sizes and can be color-coded by category (e.g., red for onesies, blue for pajamas). They’re lightweight, easy to pack, and can be used to organize clothes in a hotel dresser or suitcase.
Roll, don’t fold
Rolling minimizes wrinkles and maximizes space. For pajamas and soft tops, roll tightly and place them against the suitcase walls. Use compression bags for bulkier items like blankets; they squeeze out air while keeping the fabric protected.
If you’re traveling with a stroller, consider using the storage basket underneath for extra clothes. Pack a small, lightweight bin or bag with a few outfits and essentials, so you have easy access to them during outings. This is especially helpful for day trips or when you’re out and about for extended periods.
Maintain a mini laundry routine
Even on the road, separate dirty from clean. A small mesh laundry bag can hold dirty socks and mittens until you find a laundromat. If you’re staying in a hotel, ask for a “dry clean” service for delicate baby items—most hotels will accommodate.
For families on extended trips, consider packing a portable drying rack. These racks are lightweight, foldable, and can be set up in a hotel bathroom or on a balcony. They’re perfect for drying small items like socks, bibs, or burp cloths overnight.
How to declutter and donate old baby clothes (including how many outfits you need per month)
Even the most meticulous organizers accumulate excess clothes. Decluttering keeps the nursery functional and makes room for new growth. The key is to do it regularly—set a reminder on your phone or calendar every three months to reassess your baby’s wardrobe.
How many baby outfits do you need per month?
The American Academy of Pediatrics (AAP) suggests having 5–7 clean outfits on hand for a newborn, scaling down to 3–4 as the baby gets older. This translates to roughly 15–20 pieces per month, depending on laundry frequency. If you find you have significantly more than this, it’s time to donate.
For families with limited laundry access (e.g., no in-unit washer/dryer), you may want to keep a few extra outfits on hand. In this case, aim for 10–12 outfits per month to account for delays in laundry day. The goal is to strike a balance between having enough clothes and avoiding clutter.
Step-by-step declutter process
- Gather all garments from drawers, bins, and closets. Include any clothes stored in other rooms or given to you by friends and family.
- Sort by size and set aside any that are more than two sizes too big. If you’re unsure about the size, lay the garment next to a current outfit to compare.
- Inspect for wear; discard anything with stains, holes, or missing snaps. For lightly worn items, consider whether they’re still in good enough condition to donate.
- Package donation-ready items in a clean bag, and label with “Baby Clothes – Size ___”. If you’re donating to a specific organization, check their guidelines for acceptable items.
- Locate a donation center—many hospitals, shelters, and “Goodwill” stores accept gently used baby apparel. Some organizations, like The Salvation Army or Dress for Success, even offer pickup services for large donations.
When you donate, include a brief note for the next family: “These onesies are soft cotton, perfect for sensitive skin.” This small gesture adds value and reduces waste. If you’re donating to a shelter or organization that serves low-income families, consider including a few new items, like socks or mittens, to make the donation even more impactful.
Tips for organizing baby shoes, blankets, and accessories (including shared bedroom solutions)
Clothing isn’t the only item that needs order. Shoes, hats, and swaddles can quickly become lost in the shuffle. Here’s how to keep these accessories tidy and accessible, even in a shared space.
Organizing baby shoes
Small shoe organizers with clear windows work well on a dresser. Place each pair in its own compartment and label with the size. If space is limited, use a tiered shoe rack that slides under the crib. For families with multiple children, color-code the shoes by child to avoid mix-ups.
If you’re short on space, consider a wall-mounted shoe organizer. These organizers have pockets that can hold shoes, socks, or even small accessories like pacifiers or teething toys. They’re especially useful in shared bedrooms, as they keep items off the floor and out of the way.
Storing blankets and swaddles
Roll each blanket tightly and secure with a rubber band or a fabric tie. Store rolled blankets in a dedicated bin or in the top drawer of a dresser. For quick access, keep the most frequently used swaddles at the front of the bin.
If you have a large collection of blankets, consider using a blanket ladder. These ladders lean against the wall and allow you to display blankets in a decorative way. They’re perfect for nurseries with limited closet space and can add a cozy touch to the room.
Accessory corner in a shared bedroom
If you share a bedroom with a partner or older sibling, dedicate a low, open shelf for baby accessories. Use small baskets labeled “Hats,” “Socks,” and “Teethers.” This keeps everything visible without cluttering the main closet.
For families with limited floor space, consider a wall-mounted organizer. These organizers have hooks or shelves that can hold baskets, bins, or even a small diaper caddy. They’re perfect for keeping baby essentials within reach while freeing up floor space for other items.
Organizing baby bibs and burp cloths
Bibs and burp cloths can quickly pile up, especially during the messy feeding stages. To keep them organized, use a small bin or basket near the changing table or high chair. Label the bin with “Bibs” or “Burp Cloths” so everyone knows where to find them.
For families with multiple children, consider color-coding the bibs and burp cloths by child. This makes it easy to grab the right one during a quick outfit change. If you’re short on space, use a hanging organizer with pockets to store these items. This keeps them off the floor and within easy reach.
How to involve partners, grandparents, and caregivers in the system
An organization system only works if everyone in the household follows it. Here’s how to get partners, grandparents, and other caregivers on board without turning it into a power struggle.
Start with a family meeting
Gather everyone who helps with the baby—partner, grandparents, babysitters—and walk them through the system. Show them where each item belongs and explain why it’s important. For example, “We keep the 3–6 month onesies in this bin so we can find them quickly when the baby outgrows the current size.”
If you’re dealing with resistance, focus on the benefits. For example, “This system saves us time in the morning, so we can spend more time playing with the baby.” Or, “When everything has a place, we’re less likely to lose socks or mittens.”
Use visual cues
Labels, color-coding, and photos can help caregivers who aren’t familiar with the system. For example, take a picture of a folded onesie and tape it to the inside of the bin. This way, anyone can see how to fold and store the clothes correctly.
For grandparents or babysitters who aren’t tech-savvy, create a simple cheat sheet. Write down the basics of the system on an index card and tape it to the inside of a closet door or dresser. Include information like where to find clean clothes, where to put dirty clothes, and how to label bins.
Assign roles
Give each caregiver a specific task to make them feel involved. For example, your partner might be in charge of laundry, while a grandparent could handle folding and putting away clothes. This not only lightens your load but also ensures everyone is invested in the system.
If you’re dealing with a caregiver who’s resistant to change, start small. Ask them to handle one specific task, like putting away socks or organizing bibs. Once they see how easy it is, they’ll be more likely to embrace the full system.
Make it fun
Turn organizing into a game. For example, set a timer and see who can fold the most onesies in five minutes. Or, challenge your partner to find a specific item in the nursery—if they can do it in under 30 seconds, they win a small prize (like a coffee or a favorite snack).
For older siblings, make them “clothing helpers.” Give them a small bin to organize and let them decorate it with stickers or markers. This not only keeps them engaged but also teaches them responsibility and teamwork.
How to organize baby clothes for daycare or childcare
If your baby attends daycare or spends time with a childcare provider, you’ll need a system that keeps their clothes organized and easy to access. Here’s how to set up a daycare-friendly wardrobe that works for both you and the caregivers.
Pack a daycare-specific bin
Designate a small bin or bag just for daycare clothes. This bin should include everything your baby needs for a typical day: onesies, pants, socks, and a spare outfit. Label the bin with your baby’s name and the daycare’s name to avoid mix-ups.
If your daycare provides a list of required items (e.g., weather-appropriate clothes, extra socks), use this as a guide when packing the bin. Check the bin weekly to restock any items that have been used or outgrown.
Use a daycare caddy
A daycare caddy is a portable organizer that holds all of your baby’s essentials in one place. These caddies typically have multiple compartments for clothes, diapers, wipes, and other necessities. They’re lightweight, easy to carry, and can be stored in a cubby or on a shelf at the daycare.
When packing the caddy, include a small note with any special instructions, like “This onesie is for naps only” or “These socks are for outdoor play.” This helps caregivers know how to use each item correctly.
Label everything
Daycare centers can be chaotic, and it’s easy for clothes to get mixed up. Label every item with your baby’s name using iron-on labels, fabric markers, or sticky labels. Include the size on the label (e.g., “Emma – 6–9 mo”) to make it easier for caregivers to find the right fit.
For items that are frequently lost, like socks or mittens, consider using a bright color or pattern. This makes them easier to spot in a sea of similar items. You can also attach a small bell or rattle to socks to help caregivers find them if they fall off.
Create a daycare checklist
Make a checklist of everything your baby needs for daycare, including clothes, diapers, wipes, and any special items (e.g., a lovey or pacifier). Keep a copy of the checklist in the daycare bin and another on your phone or fridge. This ensures you never forget an essential item.
If your daycare provides a daily report, use it to track what clothes your baby wore and what needs to be washed or replaced. For example, if the report says your baby had a blowout diaper, you’ll know to check the spare outfit bin and restock it if necessary.
How to store baby clothes long-term (for future siblings or resale)
If you’re planning to have more children or hope to resell your baby’s clothes, you’ll need a long-term storage solution that keeps garments in good condition. Here’s how to store baby clothes so they stay fresh, clean, and ready for the next child (or buyer).
Clean and prep the clothes
Before storing, wash all clothes in a gentle, fragrance-free detergent. Avoid fabric softeners, as they can leave a residue that attracts pests. Once clean, inspect each item for stains, holes, or wear. Treat any stains with a gentle stain remover and mend any small holes or loose seams.
If you’re storing clothes for a future sibling, consider sorting them by size and season. This makes it easier to pull out the right clothes when the time comes. For resale, sort by size, season, and brand (if applicable), as this can increase the value of the items.
Choose the right storage containers
For long-term storage, opt for airtight, moisture-resistant containers. Plastic bins with snap-tight lids are ideal, as they protect clothes from dust, pests, and moisture. Avoid cardboard boxes, as they can attract pests and absorb moisture, leading to mold or mildew.
If you’re storing clothes in a basement, attic, or garage, consider using vacuum-seal bags. These bags remove excess air, reducing the risk of moisture damage and saving space. Just be sure to label the bags clearly, as it can be difficult to see the contents once they’re sealed.
Store in a cool, dry place
Choose a storage location that’s cool, dry, and away from direct sunlight. Basements, attics, and garages can be prone to temperature fluctuations and humidity, so avoid these areas if possible. Instead, opt for a closet, under a bed, or in a spare room.
If you must store clothes in a basement or attic, use a dehumidifier to control moisture levels. You can also add silica gel packets to the storage containers to absorb excess moisture. These packets are inexpensive and can be found at most craft or hardware stores.
Label and inventory
Label each storage container with the size, season, and contents. For example, “0–3 mo – Summer – Onesies & Shorts.” This makes it easy to find what you need without having to open every bin.
Create an inventory list of the contents of each bin. This can be as simple as a handwritten list or a digital spreadsheet. Include details like the number of items, the size, and any special notes (e.g., “3 Carter’s onesies, 2 pairs of socks”). This helps you keep track of what you have and makes it easier to plan for future needs.
Check on the clothes periodically
Even in the best storage conditions, clothes can develop issues over time. Check on your stored clothes every 6–12 months to ensure they’re still in good condition. Look for signs of pests, moisture, or mold, and address any issues immediately.
If you’re storing clothes for a future sibling, consider rotating them into the current wardrobe as your baby grows. For example, if you’re storing 6–9 month clothes, pull them out when your baby is around 4–5 months old. This gives you time to wash and prep the clothes before they’re needed.
Myth vs. fact
Myth: Baby clothes must be ironed to look presentable.
Fact: Most newborn fabrics are wrinkle-resistant; a quick shake and a fresh fold keep them tidy. If you’re concerned about wrinkles, hang clothes in the bathroom while you shower to let the steam relax the fibers.
Myth: You need a separate closet for every season.
Fact: A simple rotation system with labeled bins works for any climate and saves space. Store off-season clothes in a higher shelf or under the bed, and rotate them every 2–3 months.
Myth: All baby clothing should be stored in a dresser for safety.
Fact: Clear plastic bins with lids protect garments from moisture and pests, and they’re easier for quick visual checks. Just be sure to secure any bins or shelves to the wall to prevent tipping.
Myth: You need to keep every piece of baby clothing “just in case.”
Fact: Babies outgrow clothes quickly, and holding onto too many can lead to clutter. The American Academy of Pediatrics recommends keeping only what you need for the current size and donating the rest.
Key takeaways
- Start with a few sturdy, clear bins; label by size and season to save time.
- Fold onesies using the “sleeve-in-center, then half-fold” method to keep them wrinkle-free.
- Rotate seasonal outfits every 2–3 months to keep the closet current and functional.
- Use color-coded or size-specific labels for fast retrieval, especially in shared spaces.
- Donate any item that’s been outgrown for more than six months to reduce clutter.
- When traveling, pack a dedicated zip-top “travel bin” and roll garments to save space.
- Involve partners, grandparents, and caregivers in the system to keep it running smoothly.
- For daycare, pack a separate bin with labeled clothes and a checklist to avoid mix-ups.
- Store long-term clothes in airtight, moisture-resistant containers, and check on them periodically.
Frequently asked questions
What is the best way to store newborn clothes?
Clear, stackable plastic bins with snap-tight lids are the most versatile. They protect fabrics from moisture, allow you to see contents at a glance, and fit neatly on high shelves or under a crib. For long-term storage, consider vacuum-seal bags to save space and protect clothes from pests.
How often should you wash baby clothes?
The American Academy of Pediatrics recommends washing newborn clothing after each use to reduce the risk of skin irritation. For older infants, a wash every 2–3 days is typically sufficient unless the garment is soiled. Always use a gentle, fragrance-free detergent to avoid irritating your baby’s sensitive skin.
Can you keep baby clothes in a dresser safely?
Yes, as long as the dresser is sturdy and the drawers are not overloaded. Use drawer dividers to keep items from becoming a tangled mess, and avoid storing clothes near windows where sunlight can fade fabrics. The Consumer Product Safety Commission (CPSC) advises securing all dressers and heavy furniture to the wall to prevent tipping.
How many outfits does a baby need?
Newborns benefit from 5–7 clean outfits on hand, decreasing to 3–4 as they grow. This equates to roughly 15–20 pieces per month, depending on how often you do laundry. For daycare, pack an extra outfit or two to account for spills or accidents.
What are the best containers for baby clothes?
Clear plastic bins, fabric storage boxes with reinforced bottoms, and drawer dividers are all highly rated. Choose based on the size of your nursery and personal aesthetic preferences. For long-term storage, opt for airtight, moisture-resistant containers to protect clothes from pests and moisture.
How do you organize baby clothes by size?
Label each bin with the size range (e.g., “0–3 mo,” “3–6 mo”). Arrange the bins from smallest to largest on a shelf so you can pull the next-up size forward as your baby grows. For shared spaces, use color-coding or photos to make it easier for caregivers to find the right size.
How can I prevent baby clothes from getting wrinkled?
Fold each garment consistently, store in single-layer bins, and avoid overpacking. When traveling, roll items and place a thin layer of tissue paper between each piece. For stubborn wrinkles, hang clothes in the bathroom while you shower to let the steam relax the fibers.
How do I get my partner or caregivers to follow the system?
Start with a family meeting to explain the system and its benefits. Use visual cues like labels, color-coding, or