Discover pregnancy photo session ideas to capture your special journey with beautiful and memorable photos, get inspired now
By Shubhra Mishra — a mom of two who turned her own confusion during pregnancy into BumpBites, a global mission to make food choices clear, safe, and stress-free for every expecting mother. 💛
Check whether any food is safe during pregnancy with the BumpBites Food Safety Checker.
Download the Complete Pregnancy Food Guide (10,000 Foods) 📘
Instant PDF download • No spam • Trusted by thousands of moms
💡 Your email is 100% safe — no spam ever.
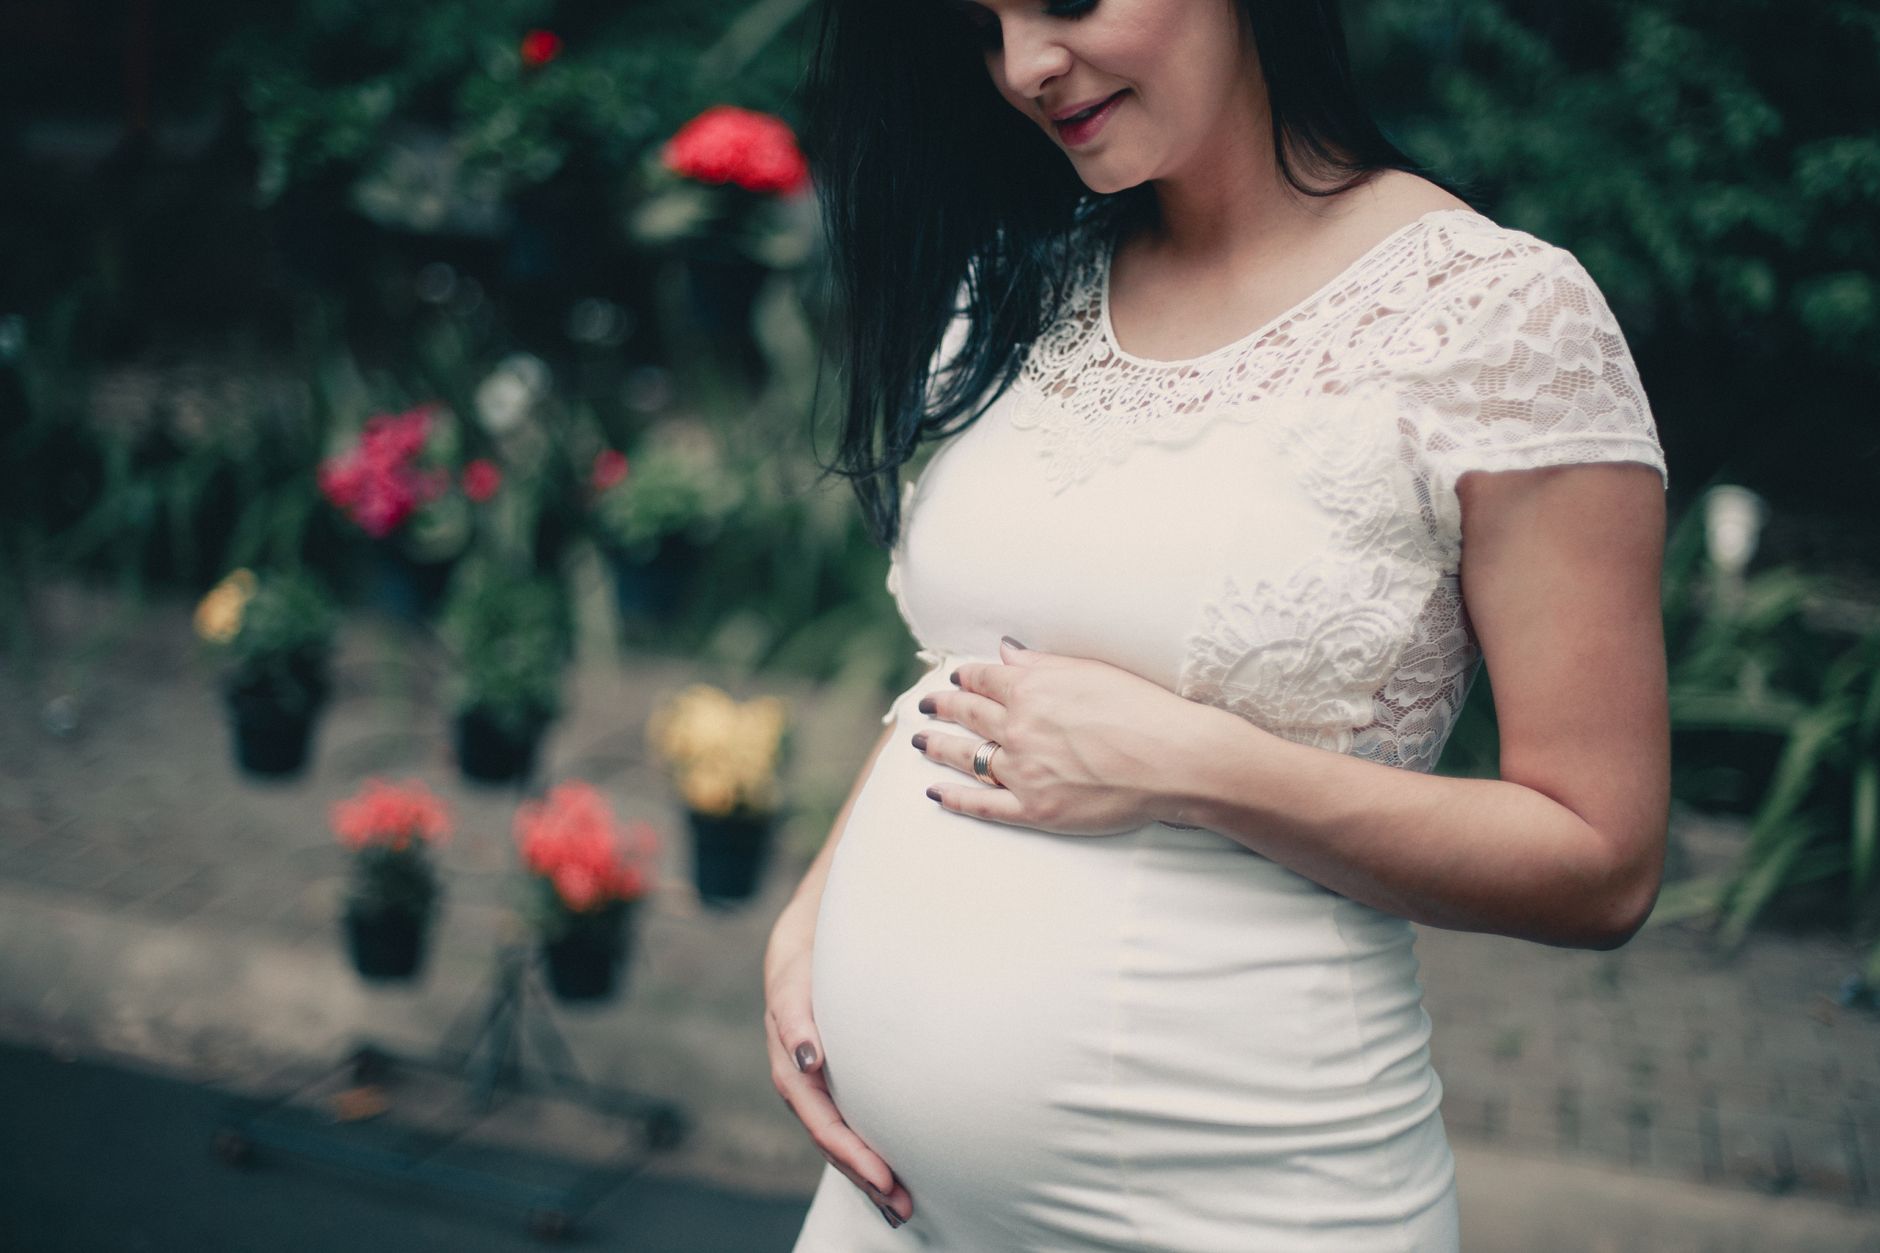
Quick take: The ideal window for pregnancy photo sessions is usually between 28 and 34 weeks, when the belly is beautifully rounded but you’re still comfortable. Choose a theme that feels true to you, pick soft‑fitting outfits in flattering colors, and use simple props like ultrasound photos or fresh flowers. Whether you’re shooting at home, in a park, or with a professional studio, plan early, keep safety first, and enjoy the moment—your glow will shine through every picture.
It’s 2 a.m., you’re curled up on the couch, scrolling through endless Instagram feeds of glowing moms‑to‑be, and you wonder, “When should I actually book my maternity photos?” You’ve already felt the first flutter of your baby’s kicks, and the idea of capturing that fleeting bump feels both exciting and a little intimidating. You’re not alone—most expectant parents grapple with timing, outfit choices, and how to involve the whole family without turning the session into a stressful production.
In this guide we’ll walk you through everything you need to know to turn those “what‑ifs” into confident decisions. From the perfect weeks for the shoot, to creative themes, wardrobe tips, budget‑friendly DIY ideas, and how to safely include partners, siblings, and even pets, we’ve compiled the most‑asked questions and real‑world solutions. By the end, you’ll have a clear plan, a checklist of props, and the reassurance that a beautiful, comfortable, and safe maternity photo session is well within reach.
Let’s dive in, step by step, so you can focus on the joy of your growing family rather than the logistics. Remember, the most memorable photos are the ones where you feel relaxed, authentic, and celebrated.
When is the best time to schedule a maternity photoshoot?
Direct answer: Most photographers recommend booking your maternity shoot between 28 and 34 weeks of pregnancy. At this stage the belly is prominently rounded, the skin is still supple, and you’re usually still comfortable enough to pose.
Why this window works so well can be broken down into three key factors:
Visible bump: By week 28 the baby’s growth is noticeable, giving you a beautiful curve to showcase without the “baby‑bump‑too‑small” worry of earlier weeks.
Comfort level: Up to about 34 weeks most women can still sit or stand for short periods without excessive fatigue or back pain. After that, the risk of premature labor rises, and you may find it harder to hold poses.
Skin elasticity: Hormonal changes often keep the skin soft and glowing in the third trimester, reducing the appearance of stretch marks that can become more pronounced later.
For twins or larger multiples, consider the earlier end of this range (around 26‑28 weeks) because the belly expands faster. If you have a high‑risk pregnancy, always check with your obstetrician (e.g., ACOG) before scheduling, especially if you’re past 32 weeks.
Here’s a quick timeline to help you visualize the best weeks:
Week
Pros
Cons
24‑27
Early glow, less pressure on belly
Baby bump may be modest, less dramatic photos
28‑34
Full, round bump; comfortable for most; optimal lighting of skin
Potential back discomfort; watch for pre‑term labor signs
35‑38
Very pronounced belly, dramatic silhouettes
Higher fatigue, limited posing options, increased medical caution
To lock in your preferred window, aim to contact photographers at least 4‑6 weeks in advance. This gives you flexibility to adjust dates if your due date shifts—a common occurrence. When you’re ready, discuss your expected delivery date, any medical considerations, and whether you’d like a studio, outdoor, or at‑home setting. That early conversation also allows the photographer to plan lighting, props, and backup plans for weather or unexpected changes.
Timing your shoot for the golden weeks ensures a comfortable, radiant experience.
What are popular themes and concepts for pregnancy photos?
Direct answer: From whimsical fairy‑tale vibes to sleek modern minimalism, the most popular maternity themes include rustic, boho, seasonal, and intimate home‑style concepts, each adaptable to your personality and setting.
Below are four broad categories that consistently resonate with families, along with specific ideas you can tailor:
Whimsical & Fairy‑Tale
Think airy fabrics, soft pastel colors, and dreamy props like flower crowns or vintage lanterns. A popular twist is the “blooming” motif—using fresh blossoms arranged around the belly to symbolize new life. Soft, diffused natural light (e.g., golden hour) adds a magical quality.
Rustic & Country
Wooden barns, weathered fences, and earthy tones create a warm, grounded feel. Props such as burlap blankets, mason jars filled with wildflowers, or a pair of well‑worn boots can emphasize the connection to nature. If you have a backyard garden, a simple set of hay bales or a vintage wagon can serve as a perfect backdrop.
Modern & Minimalist
Clean lines, neutral palettes (white, gray, navy), and sleek studio lighting highlight the shape of the bump without distraction. Consider a monochrome backdrop, a single statement piece like a flowing silk dress, or a reflective surface that captures subtle silhouettes.
Seasonal & Holiday
Celebrate the time of year—autumn leaves, snowy fields, or summer beach sunsets. Seasonal props (pumpkin patches in fall, twinkling lights for winter) make the images feel timely and can double as future holiday cards.
When choosing a theme, ask yourself:
Does the style reflect my personality or the story I want to tell?
Will the setting be accessible and comfortable?
Do I have (or can easily source) the necessary props?
Many couples blend themes—for example, a modern silhouette shot set against a rustic barn door, or a whimsical garden scene with minimalist clothing. The key is to keep the focus on you and the baby bump, letting the setting enhance rather than overwhelm the image.
What should I wear for a maternity photo session?
Direct answer: Choose outfits that are comfortable, fit well, and complement your skin tone—soft fabrics, solid colors, and simple silhouettes work best for highlighting the bump while keeping you relaxed.
Here are detailed wardrobe guidelines:
Fabric & Fit
Opt for stretchy, breathable fabrics like jersey, cotton, or light chiffon. Avoid stiff materials that can hide the curve of your belly. A fitted dress or a flowing maxi with a cinched waist draws attention to the bump without feeling restrictive.
Color Palette
Solid, muted tones such as ivory, soft gray, dusty rose, or deep navy tend to photograph beautifully. If you love bright colors, choose one accent piece (e.g., a vibrant scarf) while keeping the rest neutral to avoid overwhelming the image. For outdoor shoots, earth tones blend well with natural settings; for studio sessions, a classic white dress creates a timeless silhouette.
Layers & Accessories
Layering adds depth. A lightweight cardigan, denim jacket, or sheer shawl can be draped over the shoulders for a relaxed look. Simple jewelry—like a delicate necklace that rests on the bump—adds a subtle sparkle without stealing focus.
Footwear
Comfort is king. Bare feet work beautifully for indoor or beach shoots. If you prefer shoes, consider low‑heeled sandals or soft ballet flats that complement the outfit without causing strain.
What to Avoid
Heavy prints or busy patterns that can distract from your shape.
Neon colors that may “bleed” in photographs.
Tight waistbands that dig into the skin and cause discomfort.
For budget‑friendly options, try borrowing a dress from a friend, shopping second‑hand stores, or repurposing a favorite maxi dress you already own. Many photographers suggest bringing at least three outfit changes, allowing you to experiment with different looks during the session.
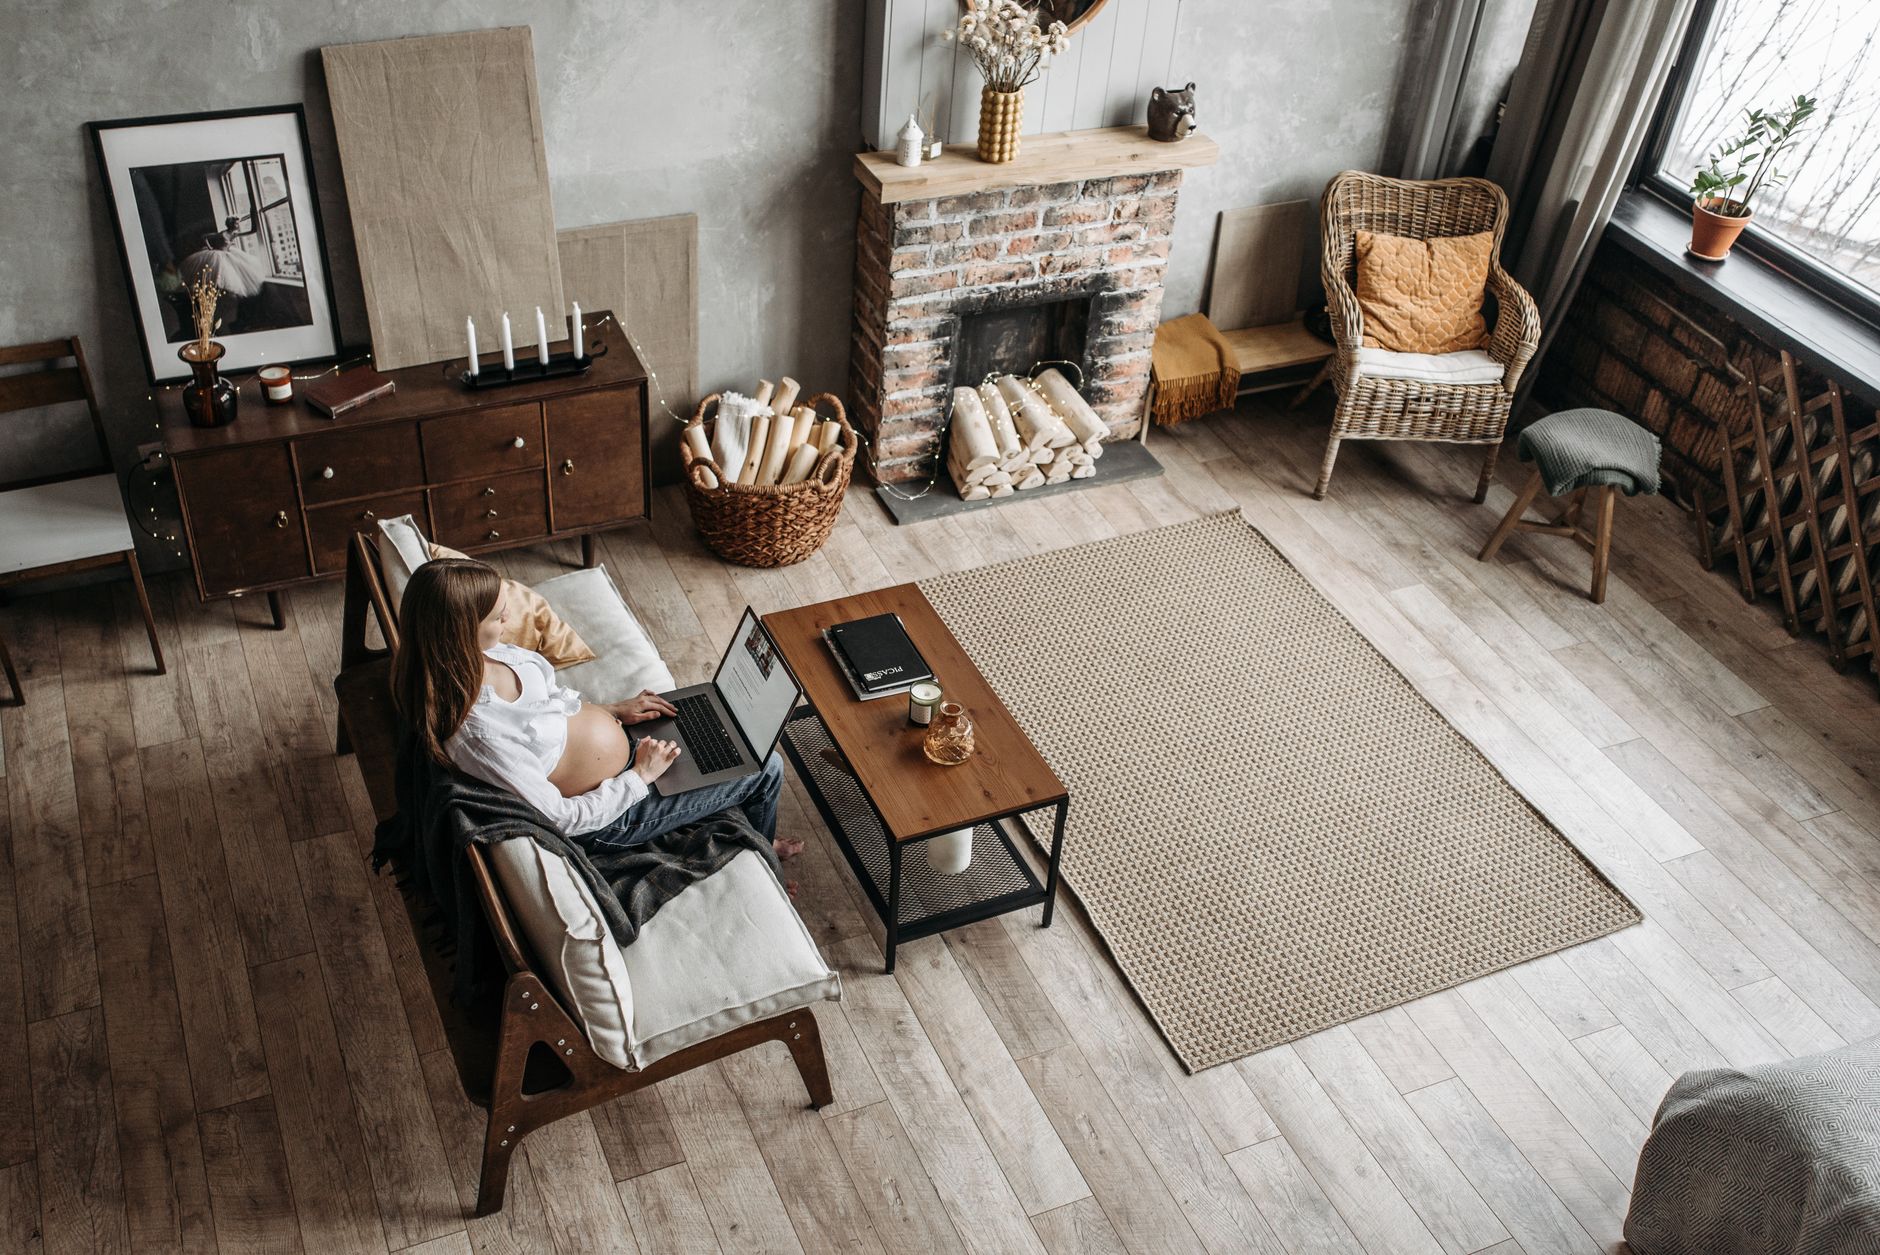
Creative indoor pregnancy photo ideas to try at home?
Direct answer: Turn everyday spaces into a studio by using natural light, simple props, and personal touches—think sunrise window light, cozy blankets, and meaningful items like ultrasound photos.
Here are five indoor concepts you can set up with little extra cost:
Sun‑lit Window Silhouette
Position yourself near a large window during the golden hour (roughly an hour after sunrise). The soft, directional light creates a beautiful silhouette of your belly. A sheer white curtain can diffuse the light for a softer effect.
Storytelling Blanket Layout
Lay a large, textured blanket (think knitted or woven) on the floor. Place baby clothes, tiny shoes, or a favorite stuffed animal around your bump. Lie on your side or sit cross‑legged, letting the items frame the belly.
Ultrasound Collage Wall
Print your ultrasound images and arrange them on a wall or board as a backdrop. Stand or sit in front, holding a framed copy of the scan. This adds a sentimental layer and makes the photos uniquely yours.
Mirror Reflections
Use a full‑length mirror to capture both your profile and a front view simultaneously. Position a lamp or natural light source on one side for subtle highlights. Mirrors add depth and a creative visual twist.
Cozy Reading Nook
Set up a favorite chair with a plush throw, a stack of baby books, and a steaming mug of tea. Capture candid moments of you holding a storybook—perfect for announcing the upcoming arrival.
When shooting at home, remember to clear clutter, keep the space safe (no loose cords or heavy objects nearby), and have a friend or partner help hold the camera or act as a second‑hand photographer. Even a smartphone with a tripod can produce stunning results if the lighting is right.
A simple home set‑up can feel as polished as a studio.
Unique outdoor maternity photoshoot locations and settings?
Direct answer: Outdoor venues such as botanical gardens, beach dunes, historic streets, and rolling fields offer natural backdrops that enhance your glow while providing variety for a timeless album.
Below is a guide to selecting a location that matches your theme and logistical needs:
Botanical Gardens & Parks
These spaces deliver vibrant flora, winding paths, and soft foliage—perfect for a romantic, nature‑focused shoot. Look for areas with blooming flowers in spring or autumn foliage for color contrast. Early morning or late afternoon provides gentle sunlight.
Beach or Lakeside
Sand, water, and open sky create a serene, airy feel. A flowing white dress or a simple sarong can catch the breeze for dynamic movement. Be mindful of wind; a sturdy windbreak (like a dune) can help keep skirts from blowing away.
Historic Architecture
Old brick walls, stone arches, or Victorian houses add a timeless elegance. Pair with a classic outfit (e.g., a fitted navy dress) to let the architecture complement the silhouette rather than compete.
Open Fields & Farm Settings
Rolling hills, haystacks, and a rustic barn provide a relaxed, earthy backdrop. These locations work especially well for rustic or boho themes. Bring a few props—like a wooden bucket of fresh produce—to add story depth.
Urban Rooftops
If you love a modern vibe, a rooftop with city skyline views offers sleek lines and dramatic perspective. Shoot at sunset for a warm glow that silhouettes the skyline behind you.
When scouting locations, consider the following practical tips:
Permits: Some public parks and historic sites require a photography permit; check local council regulations.
Accessibility: Ensure the area is safe for walking and that you can rest if needed—bring water, a portable seat, and a light blanket.
Weather backup: Have an indoor alternative (like a nearby café) in case of rain or high winds.
Finally, coordinate with your photographer about the timing of sunrise or sunset, as the “golden hour” (roughly 30 minutes after sunrise or before sunset) provides the most flattering, soft lighting for outdoor maternity images.
How to include partners and siblings in maternity pictures?
Direct answer: Involve your partner and any children by using interactive poses, coordinated outfits, and meaningful props that showcase love and anticipation.
Here are practical ways to make every family member feel part of the story:
Coordinated Outfit Colors
Pick a palette (e.g., soft neutrals with a pop of sage green) and have each person wear complementary shades. Matching colors unify the image without looking overly “matching.”
Hands‑Holding and Belly‑Kissing
Simple gestures—your partner placing both hands on your belly, a sibling gently resting a hand on the bump—create intimate moments. Capture the connection from both close‑up and wide‑angle perspectives.
Interactive Play
Encourage children to hold baby shoes, a tiny blanket, or a “big brother/sister” sign. Their natural excitement adds genuine emotion to the frames.
Pet Inclusion
If you have a dog or cat, let them sit or lie beside you. Offer a treat to keep them calm, and use a leash if needed for safety. Pets often become beloved members of the newborn’s first photo album.
Storytelling Props
Use a chalkboard or wooden sign with a message like “Our little miracle arriving [Due Date]”. Have the whole family take turns writing or holding the sign, capturing candid smiles.
During the session, keep a relaxed pace. Allow breaks for snacks and bathroom trips, especially for the expectant mother. A supportive partner can help by holding the camera, adjusting lighting, or simply providing encouragement between poses.
DIY pregnancy photoshoot tips for budget‑friendly options?
Direct answer: You can achieve beautiful maternity photos without a professional photographer by using a smartphone, natural light, simple backdrops, and a few creative props that you already own.
Follow this step‑by‑step plan to create a DIY shoot that feels polished:
Choose the right time of day. Aim for early morning or late afternoon when sunlight is soft. Position yourself near a large window or step outside for diffused light.
Set up a tripod or stable surface. Use a phone tripod or stack books to keep the camera steady. Set a timer (2‑3 seconds) to give yourself time to pose.
Pick a clean backdrop. A plain wall, a sheet hung as a backdrop, or a simple curtain works well. If you have a solid‑color sheet, iron it for a smooth look.
Use household props. A bowl of fresh fruit, a handwritten note, a favorite baby blanket, or a pair of tiny shoes can add storytelling without cost.
Enlist a helper. Ask a partner, friend, or sibling to be the photographer. They can adjust angles, suggest poses, and help you feel relaxed.
Edit lightly. Free apps like Snapseed or Lightroom Mobile let you adjust brightness, contrast, and warmth. Keep edits natural—enhance the glow, don’t overhaul the image.
Safety tip: Avoid standing on chairs or ladders to get a higher angle. If you need a higher perspective, place the camera on a sturdy table and lie down or sit on the floor.
Budget‑friendly outfit ideas include borrowing a dress, wearing a comfortable maternity tee with a flowy skirt, or repurposing a plain white shirt you already own. The key is to feel confident and at ease, because confidence translates directly into the photographs.
Essential props and accessories for a memorable maternity shoot?
Direct answer: Props should highlight the baby bump, tell a personal story, and add visual interest—common choices include ultrasound photos, tiny shoes, fresh flowers, handwritten signs, and soft blankets.
Below is a curated list of prop ideas, grouped by theme, with suggestions on where to find them affordably:
Sentimental Props
Ultrasound image framed or printed on canvas.
Baby’s hospital bracelet or a tiny pair of socks.
Family heirloom (e.g., a crocheted blanket) to pass down.
Nature‑Inspired Props
Seasonal flowers (e.g., lavender for a spring shoot, sunflowers for summer).
Leaves or branches arranged in a wreath around the belly.
Fresh fruit or vegetables for a rustic farm vibe.
Creative Text Props
Chalkboard or wooden sign with a message (“Baby on board – due [Month]”).
Letter blocks spelling out the baby’s name or “B” for baby.
Scrapbook pages with pregnancy milestones.
Fabric & Texture
Soft, oversized blankets in neutral hues.
Sheer curtains or lace for a delicate overlay.
Rope or burlap for a rustic texture.
Playful Extras
Balloon letters or a single large balloon shaped like a heart.
Miniature toys representing the baby’s future (e.g., a tiny stethoscope).
Pet accessories (a bandana for the dog) to include furry family members.
When selecting props, keep these practical considerations in mind:
Safety first: Avoid sharp edges, heavy items that could tip over, or anything that could cause you to lose balance.
Scale: Props should complement, not overwhelm, the belly. A tiny pair of shoes or a small sign works better than a massive object.
Personal meaning: Choose items that tell your story—your partner’s favorite book, a family recipe card, or a piece of your cultural heritage.
Even a simple prop like a single rose or a handwritten note can transform an ordinary pose into a cherished memory.
From our medical team: Maternity photography is a wonderful way to celebrate your pregnancy, but remember to prioritize comfort and safety. Stay well‑hydrated, avoid poses that strain your back or put pressure on your abdomen, and keep sessions short—especially in hotter weather. If you experience dizziness, contractions, or any unusual symptoms, pause the shoot and contact your provider. Enjoy the experience, and let your natural glow be the star of every picture.
Myth vs. fact
Myth: You must wait until the very end of pregnancy for the most dramatic belly photos.
Fact: The 28‑34 week window offers a full, round bump while still allowing comfortable posing; waiting too late can increase fatigue and limit movement.
Myth: Professional maternity shoots are always expensive and out of reach.
Fact: Many photographers offer mini‑sessions, and DIY home shoots with a smartphone can produce stunning results for a fraction of the cost.
Myth: You need elaborate, expensive props to make photos look special.
Fact: Simple, meaningful items—like a tiny pair of shoes or a handwritten sign—add personal depth without breaking the bank.
Key takeaways
Schedule your shoot between 28 and 34 weeks for the ideal bump shape and comfort.
Pick a theme that reflects your personality; popular ideas include whimsical, rustic, modern, and seasonal concepts.
Use natural light—window sunrise or golden hour outdoors—for the most flattering glow.
Incorporate sentimental props (ultrasound photos, baby shoes, fresh flowers) to tell your story.
Involve partners, siblings, and pets with coordinated colors and gentle, interactive poses.
DIY options with a smartphone, tripod, and household props can create beautiful images on a budget.
Always discuss any medical concerns with your provider and keep safety first during the session.
Frequently asked questions
What is the ideal week for a maternity photoshoot?
Most experts, including ACOG and NHS guidelines, suggest 28 to 34 weeks as the sweet spot because the belly is prominent yet you remain comfortable for posing.
How do you prepare for a maternity photoshoot?
Start by selecting outfits, gathering props, and scouting locations a week in advance; hydrate, moisturize your skin, and get a good night’s sleep the day of the shoot.
What should I bring to my maternity photo session?
Pack extra outfits, a soft blanket, a few personal props (ultrasound photo, baby shoes), a water bottle, snacks, and a mirror for quick outfit checks.
What are some unique maternity photoshoot themes?
Consider whimsical fairy‑tale (flower crowns), rustic barn with hay bales, modern minimalism with monochrome backdrops, or seasonal themes like autumn leaves or beach sunrise.
How much does a professional maternity photoshoot cost?
Prices vary widely; in the U.S., a standard session ranges from $150 to $500, while in the UK you might expect £100‑£400. Mini‑sessions or bundle packages with newborn photography often provide better value.
Can I do a maternity photoshoot at home?
Absolutely—home shoots using natural light, a plain wall or sheet backdrop, and simple props can look as polished as studio sessions when planned thoughtfully.
When to call your doctor
If you experience any of the following during or after your photoshoot, contact your obstetric provider promptly: sudden or severe abdominal pain, bleeding, contractions that don’t subside, dizziness, shortness of breath, or a rapid increase in swelling. This article is for general information only and does not replace personalized medical advice.
References
American College of Obstetricians and Gynecologists (ACOG). “Maternity Care Guidelines.” 2023.
National Health Service (NHS). “Pregnancy: Photo Tips and Safety.” 2022.
World Health Organization (WHO). “Maternal Health Recommendations.” 2023.
American Academy of Pediatrics (AAP). “Family Photo Sessions and Infant Safety.” 2022.
Royal College of Obstetricians and Gynaecologists (RCOG). “Maternity Photography and Comfort.” 2021.
U.S. Department of Health & Human Services (CDC). “Pregnancy and Physical Activity.” 2022.
British Association of Photographers (BAP). “Best Practices for Outdoor Portraiture.” 2022.
Editor's pick for this topic
About the Author
When Shubhra Mishra was expecting her first child in 2016, she was overwhelmed by conflicting food advice — one site said yes, another said never. By the time her second baby arrived in 2019, she realized millions of mothers face the same confusion.
That sparked a five-year journey through clinical nutrition papers, cultural diets, and expert conversations — all leading to BumpBites: a calm, compassionate space where science meets everyday motherhood.
Her long-term vision is to build a global community ensuring safe, supported, and free deliveriesfor every mother — because no woman should face pregnancy alone or uninformed. 🌿
🌍 Stand with mothers, shape safer guidance
Join a small circle of experts who review BumpBites articles so expecting parents everywhere can decide with confidence.